SSL when Port 80 is not Allowed.
This tutorial assumes you are using a google domain that you purchased from domains.google.com. And as a bonus is done entirely in windows, no Linux is required. However that being said, some knowledge of how to forward ports and at least a beginner's level of comfortability with a command prompt is required.
1: First download and install certbot from certbot.eff.org
2: In your google domain make sure you add an A record pointing to your public ip by going to the DNS tab in domain management and adding the record as a custom resource record. (Bonus points if you set it up with dynamic DNS but I'm trying to keep this as straightforward as possible).
3: Launch certbot as an admin and a cmd prompt will open. In the window enter
certbot -d yourdomainhere.com --manual --preferred-challenges dns certonly
(ENSURING YOU REPLACE YOURDOMAINHERE.COM WITH YOUR ACTUAL DOMAIN)
If typed correctly you will get this response:
Please deploy a DNS TXT record under the name _acme-challenge.yourdomainhere.com with the following value:xxxxxxxxxxxxxxxxxxxxxxxxxxxxxxxxxxxxxxxxxxxOnce this is deployed, Press ENTER to continue
4: Now, in your google domain administration, go to the very bottom of the dns tab and add another custom record.
5: Change the record to a txt record
6: ensure the sub domain is _acme-challenge
7: copy and paste the generated value from your certbot window as the value for your txt record.
8: Wait a few minutes for the record to update, and finally hit enter in your certbot window
9: Congrats, you have a signed ssl certificate without having to open incoming connections on port 80.
10: Navigate to where certbot said it saved your full chain and privkey and move them to your desired directory
11: Link to your certificates like normal in your foundry settings, ensuring your foundry port is set to 443.
12: Assuming you have port 443 forwarded in your router and open in your firewall when you have foundry open, you will be able to access it via your custom link now and have the fancy valid tag when people connect.
Converting PEM Files to PFX
This part is taken from:
https://supporthost.in/how-to-install-lets-encrypt-on-windows-server-2019/
You can use online PEM to PFX converter tools or openssl commands. You would then import.
Using openssl you can use the following command from the root of the certbot/live folder. The folder path should be something like: C:\Certbot\live\yourdomain.com
openssl pkcs12 -export -out yourdomain.pfx -inkey privkey.pem -in cert.pem
From ISS you can then import the Certificate.
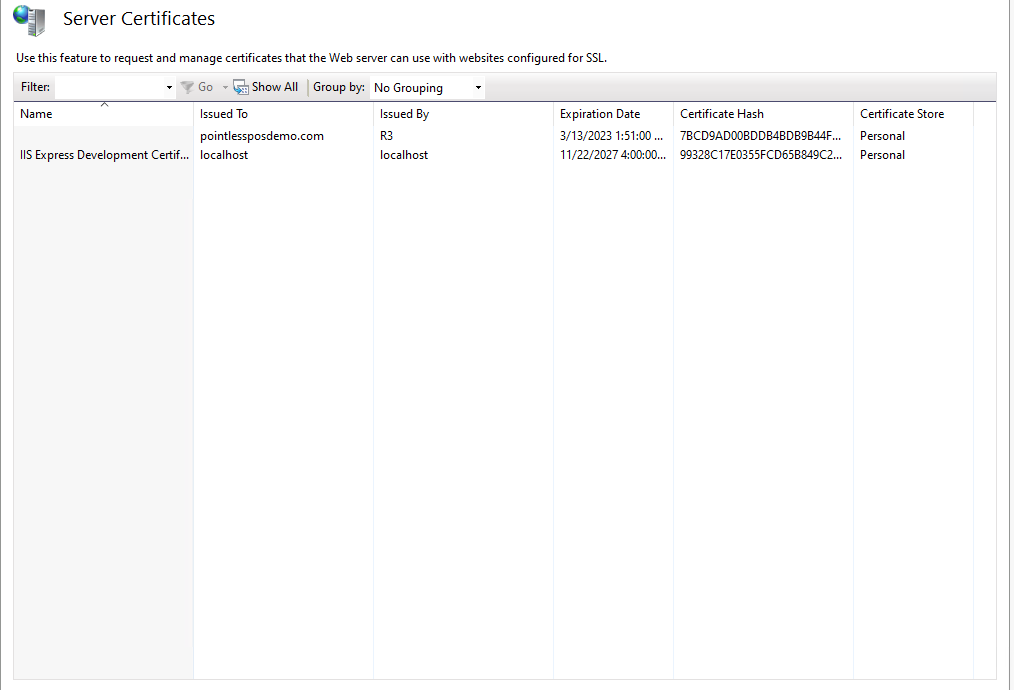
SSL Certificate
You can then bind the SSL Certificate to your website.
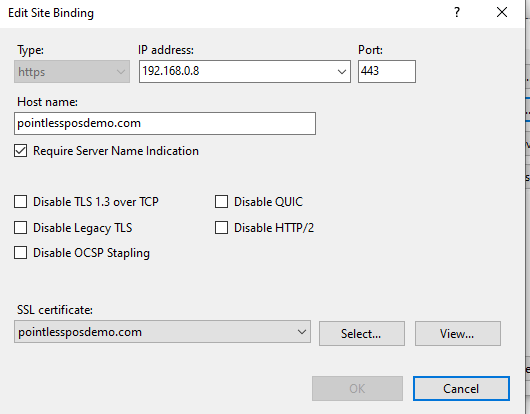
Binding