Content Management
Content Management (Wordpress Integration) allows you to include posts from your WordPress site in the Ecommerce portion of the Point of Sale application. This lets you promote information, provide documentation, link to your main site, and more. WordPress content is shown only on the web storefront — the native apps will not display it.
What Is WordPress Integration?
WordPress integration connects a headless WordPress CMS to your POS web storefront. Posts from your WordPress site are pulled in via the WordPress REST API and displayed in customizable content areas throughout the app.
These content areas include:
| Area | Description |
|---|---|
| Header | Banner or promotional content at the top of the storefront |
| Footer | Informational content at the bottom of the storefront |
| Department Head | Content displayed at the top of a department page |
| Category Head | Content displayed at the top of a category page |
| Menu Head | Content displayed at the top of a menu page |
| Brand Head | Content displayed at the top of a brand page |
| Main Page | Content displayed on the main storefront landing page |
| Tier Head | Content displayed at the top of a price tier page |
| Sale Policy | Content displayed for sale policy or terms |
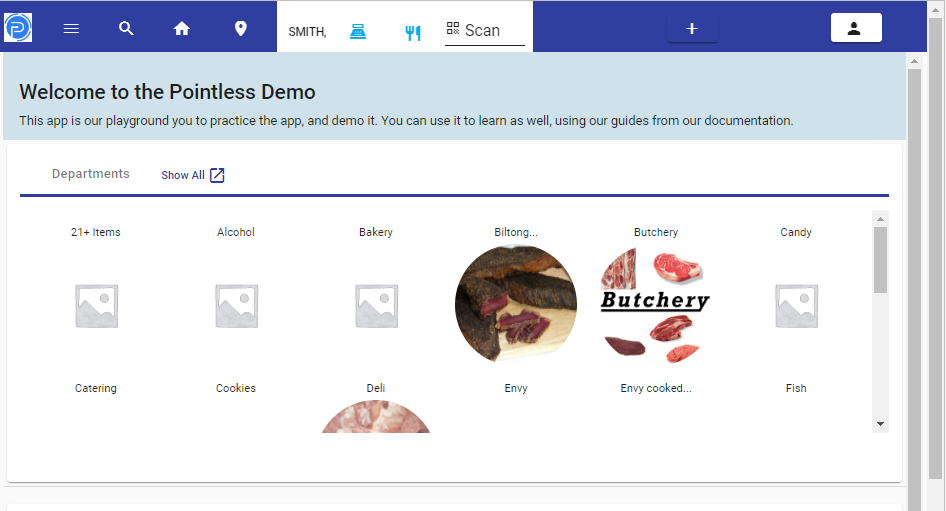
Playground header provided by WordPress
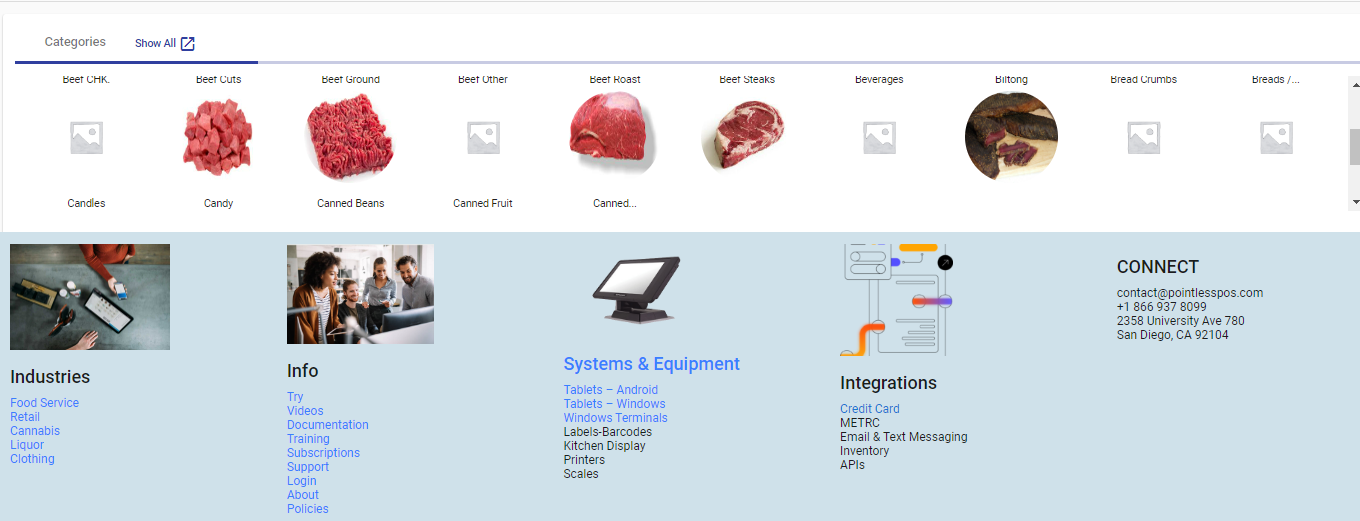
Footer Info provided by WordPress

Department Slug Info
Setup
Step 1: Configure WordPress CMS Endpoint
First, input the domain you are using for your WordPress site under the Interfaces settings in Software & Hardware > Interfaces.
In the WordPress CMS section, enter your WordPress REST API endpoint:
- CMS - WordPress — Your WordPress REST API base URL (e.g.,
https://yourdomain.com/wp-json/wp/v2/posts?slug=)
This endpoint is stored in UIHomePageSettings.wordpressHeadless and is used to fetch blog post content by slug.
Step 2: Configure Content Sections
Navigate to Settings > Software & Hardware Settings > Content Settings to open the Blog/Content editor.
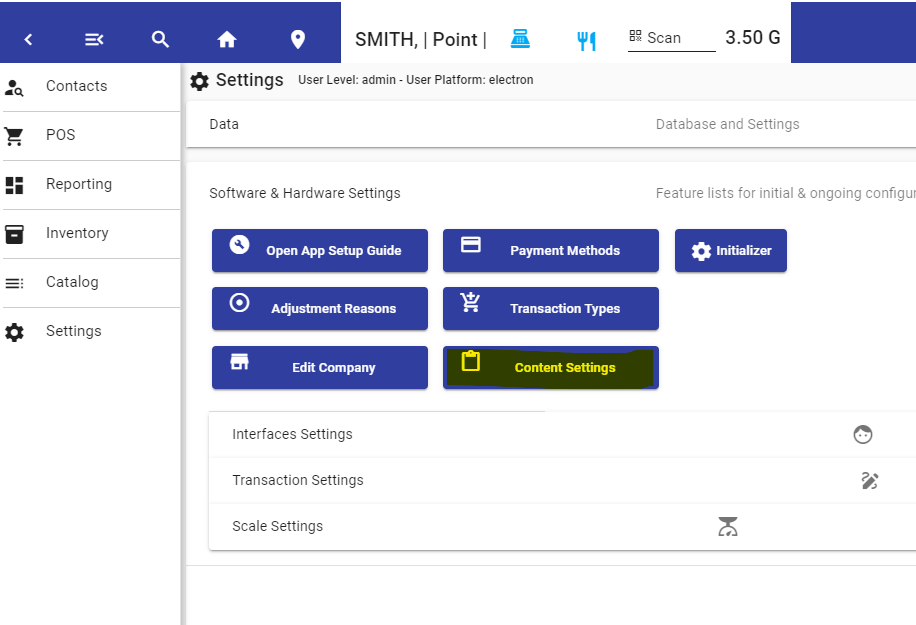
Content Section
Step 3: Assign WordPress Posts
In the Content Settings editor, you can:
- Choose a Content Group (see Content Groups)
- Add blog post entries and assign WordPress posts via their slug (the post name)
- Sort posts to arrange their display order
- Enable or disable individual posts
Post List
When editing a post, the actual WordPress content is fetched and rendered in the editor so you can verify your work as you go.
POS Editor
Blog Post Editor
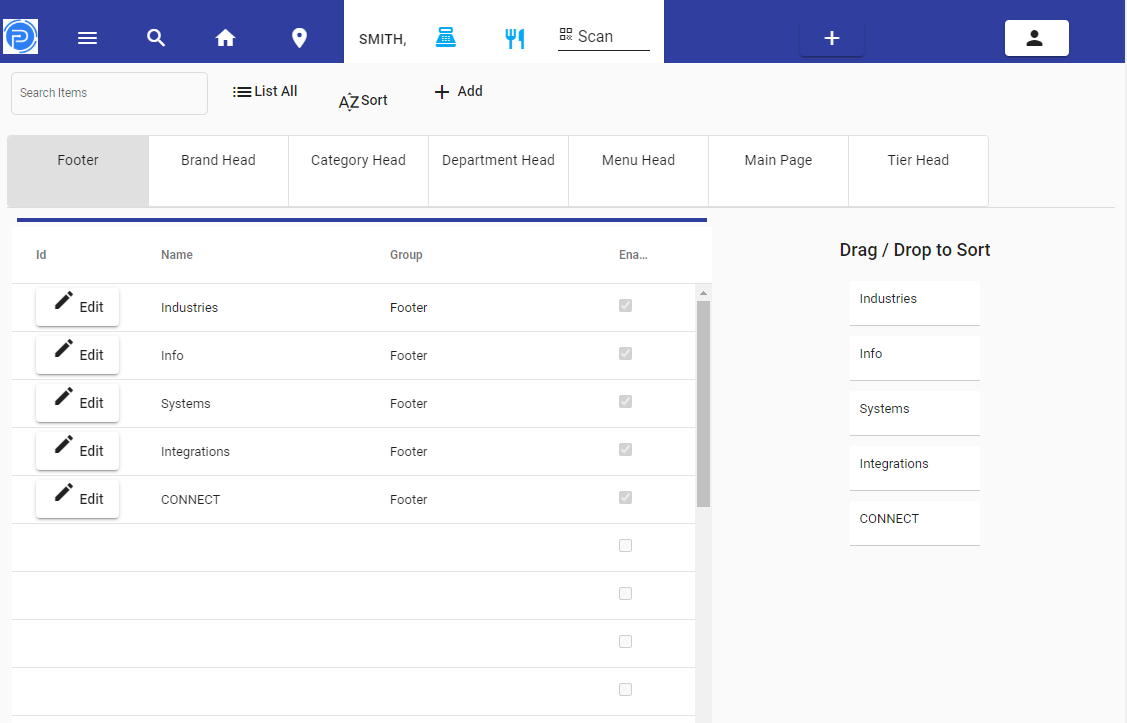
The blog list editor is accessible from Settings > Software & Hardware > Content Settings. It provides two views:
Grid View (Default)
An AG-Grid table displaying all blog post entries with the following columns:
| Column | Description |
|---|---|
| Edit | Opens the blog post in the dialog editor |
| Name | Display name of the content entry |
| Group | The content group this entry belongs to |
| Enabled | Checkbox indicating whether the post is active (read-only in grid) |
Toolbar actions:
| Action | Description |
|---|---|
| Search | Filter blog entries by name |
| List All | Clear the search filter and show all entries |
| Sort | Toggle between the AG-Grid view and the drag-and-drop sort view |
| Add | Create a new blog post entry (opens dialog editor with blank form) |
| Group Filters | Toggle buttons to filter by content group (Footer, Brand Head, Category Head, etc.) |
| Export CSV | Export the blog list to a CSV file |
Sort View
When Sort is toggled on, the list switches to a drag-and-drop interface. You can reorder blog posts within a group by dragging them to the desired position. Changes are saved automatically on drop.
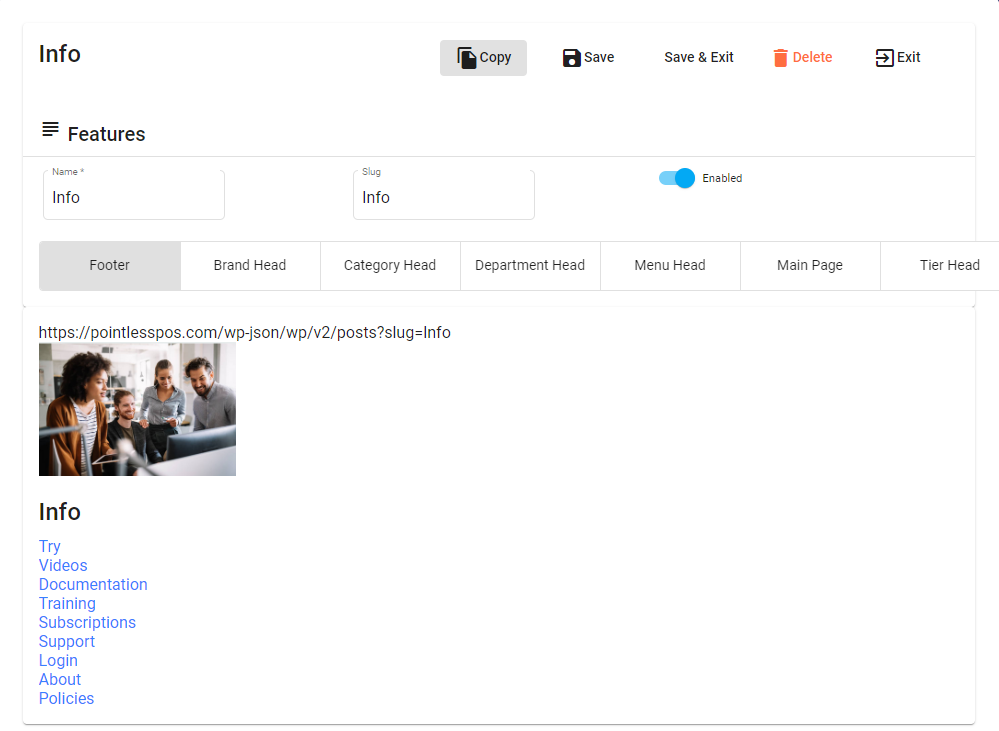
Blog Post Dialog Editor
Clicking Edit on a row or Add to create a new entry opens the dialog editor with the following fields:
| Field | Type | Description |
|---|---|---|
| Name | Text | Display name for the content entry (required, max 50 characters) |
| Slug | Text | The WordPress post slug. The system fetches content from {wordpressHeadless}{slug} |
| Enabled | Toggle | Whether this post is active and displayed in the storefront |
| Group | Toggle Buttons | The content group this entry belongs to (one of the 8 content groups) |
Dialog actions:
| Button | Description |
|---|---|
| Save | Saves the entry and keeps the dialog open |
| Save & Exit | Saves the entry and closes the dialog |
| Delete | Removes the blog post entry |
| Copy | Duplicates the current entry |
| Cancel | Closes the dialog without saving |
Below the form fields, if the WordPress endpoint is configured and the slug is valid, the fetched WordPress post content is rendered as a live preview inside the editor.
How Content Is Displayed
Blog posts are rendered in the storefront via two display components:
- BlogPostList — Displays a collection of posts for a given group. Supports
listandgridview modes. Posts are filtered by group and enabled status, sorted by theirsortvalue, and fetched from the WordPress REST API. - BlogPost — Displays a single post by slug. Fetches content from
{wordpressHeadless}{slug}and renders thecontent.renderedHTML from the WordPress response.
Content is loaded dynamically from your WordPress site. The system also loads a styles.css file from assets/wp/styles.css to apply custom WordPress styling to the rendered content.
Content Management lets you keep your storefront content in sync with your WordPress site without modifying the POS application. Update your WordPress posts and they reflect automatically in the web storefront.