Performing Sales & Transactions
Overview
To perform sales, you should have an understanding of what your job entails. For different types of businesses, from food service to retail, different steps and behaviors are required.
These examples indicate some of these steps, but keep in mind that there isn’t going to be a simple comprehensive answer for your specific scenario. In this guide, we try to highlight a number of business types and then focus on some of the features that are more common for those business types.
You may operate a simple business, or a very regulated one, like cannabis. But your cannabis location might operate differently in one state than another. Your coffee shop could operate differently than one that takes phone orders or drive-thru.
A few examples of what might happen when trying to perform a sale:
- The software might prompt for sizes, or extra features of the item when selling an item.
- Or the system may ask for a certain type of order to be chosen, for example, dine-n or to go, or recreational or medical sale.
- You might assign an order to a table, or a specific location. You might schedule an order.
So if you have a system that doesn’t require specific user type choices, a sale might occur as soon as you select an item.
To perform a sale, you can start by choosing an item, and it will be added to an order that is also created at that same moment.
Or you might have to first choose a customer, for example, a patient or a regular recreational customer.
Types of Businesses:
For the next few sections, we’ll cover different types of businesses, and how they might process sales. Your particular business might be different, but the general ideas will still apply.
We have playgrounds for you to follow along and test these features:
pointlesspos.web.app
cannabispos.firebaseapp.com
New Orders
To start new orders, refer to the screen:
- New Orders - You can use the Plus Sign on the top toolbar.
- You can use the New Order button or the Other New Button.
- Once you have started an order, you can change the order type. You can do this from the edit cart window.
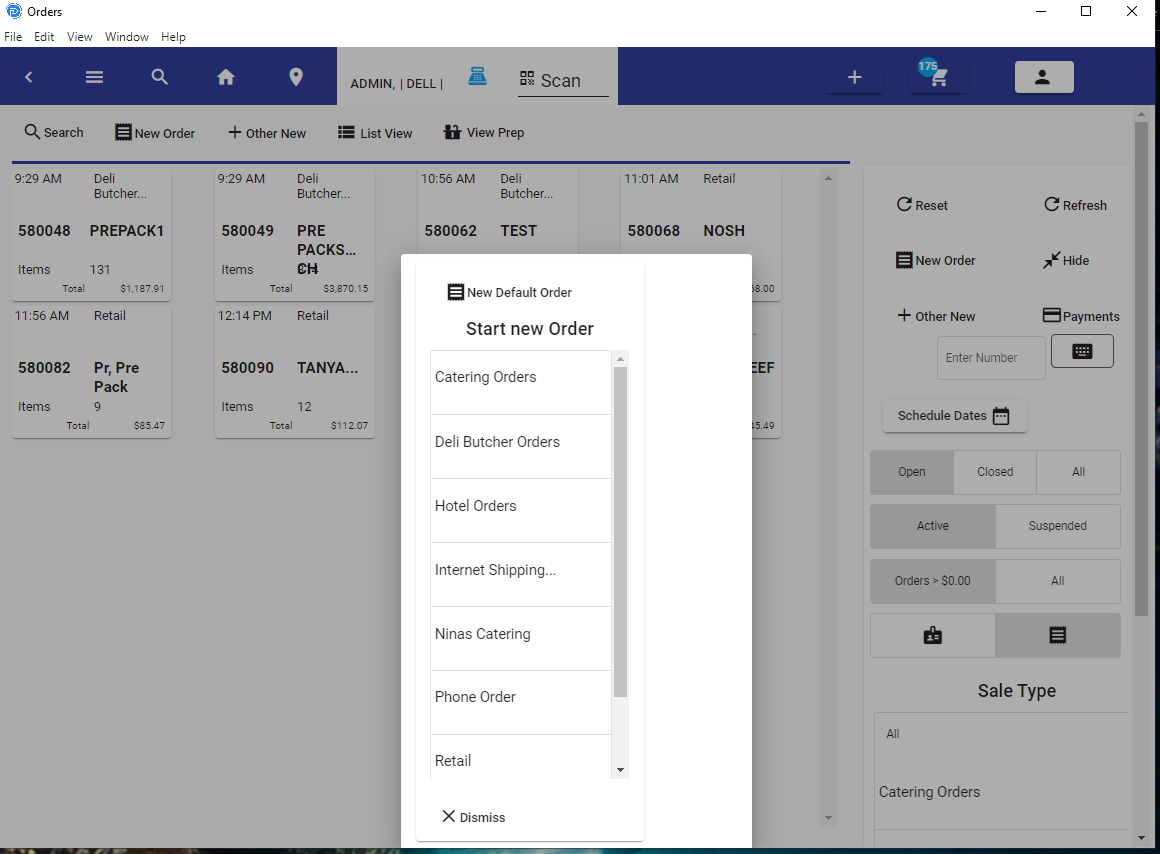
New Order
Cannabis
To begin with, keep in mind this will be a general guide, and not state-specific.
Reference https://cannabispos.firebaseapp.com/ when using this document.
Assigning Customers & Patients
If you are using Android, you can scan the driver's license using the icon at the top toolbar. You then place the Driver License 2D Barcode in front of the camera.
To assign a customer after the order has started, you can select the customer on the lookup. You can use your name, phone number, and account number.
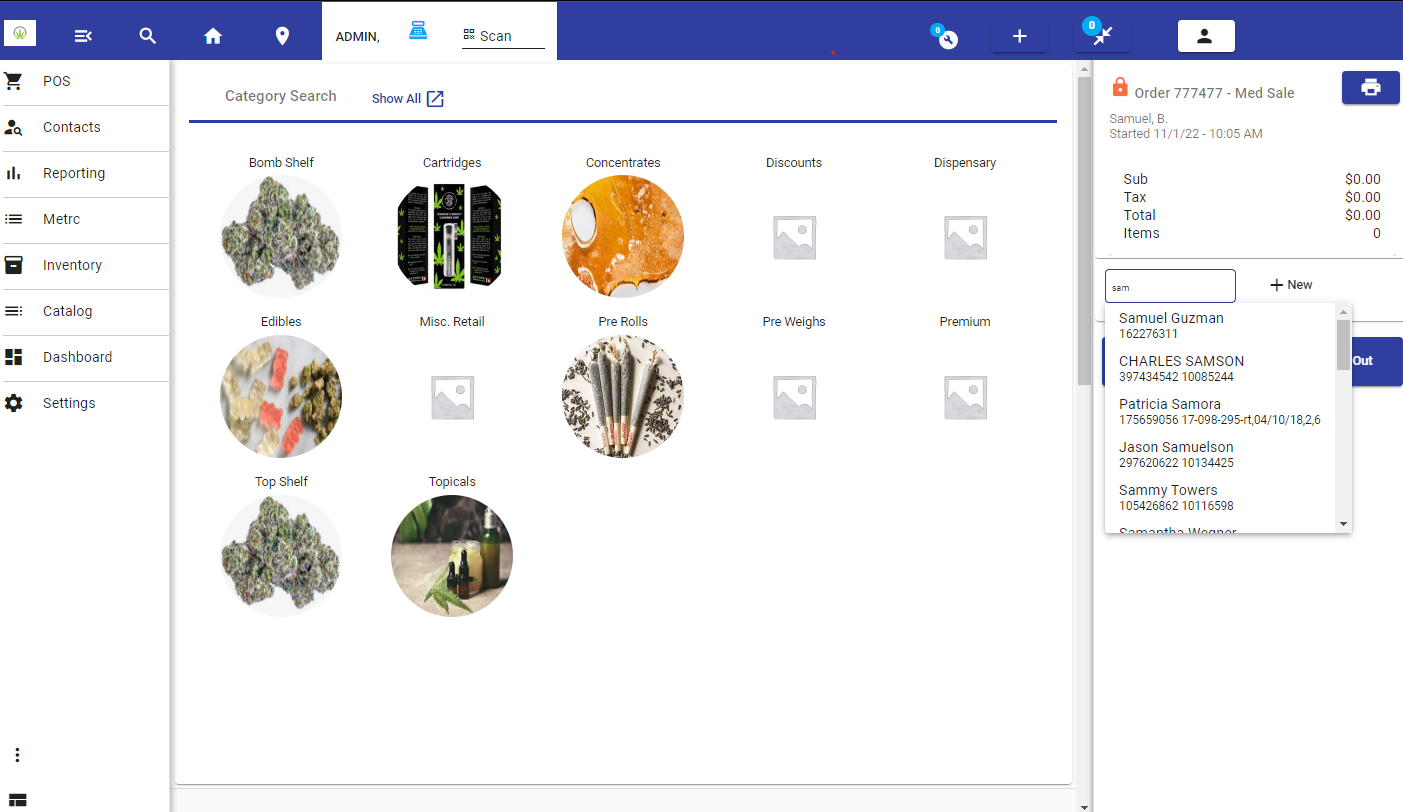
Customers and Patients
Assigning a customer to a new order is easy. But you may need to assign or verify certain features of the client before proceeding. For example, DOB, License, etc. These are going to be specific to your state/ business requirements.

Locating the order assigned to a Customer
Finding the customer in the order screen (the cash register icon on the toolbar: Please see the filter options on the right.

Order Management
Applying Items to Orders, Modifying Orders
Selling Items
This section depends on how your layout is configured. You may or may not have an attached scale, so items that use weight may or may not apply.
Selling Metrc Items, and items in general: It is assumed that your items will be tracked through inventory. So when scanning a barcode of any item, you would use your store's assigned labels that have barcodes.
When opening an order, or starting an order, the barcode scanner is prepped to scan items. You simply scan an item and it will add that item to the order.
Example of Scanned Items on an order:
Working on an order.
These are a few example codes that work with the playground. You can find more items in inventory to use as well.
- **Variables:
- Pt-1000000056
- Mt-0000057-1
- Mt-0001016-1
- Mt-0000952-1
Pt-1000000054 Should report not available for sale.
You can verify these items by going to the Main toolbar, then inventory, then looking them up.
Selling non- METRC Items
Selling non-METRC Items can be allowed if your business permits it.
Label Printing
The label icon for printing labels is located on the POS Order Screen. If you are not on that screen, use the edit cart button from the Order bar on the right.
You can not print Labels from the web interface, or print receipts.
Adjusting order Prior to completion:
For items, you can select the three dots, and based on the item type, and the allowed options, you will see features you can change.
You can also swipe to delete an item, but if labels are printed you can only void the item.
Food Service
Food service can range from quick service restaurants to dining. Here we have gathered many features you should see in our playground. You are welcome to try them out as you move along the list and explanations.
Assigning Customers
To assign a customer after the order has started, you can select the customer on the lookup. You can use your name, phone number, and account number.
Working on orders
For working with tables, see Table Management
From the Edit Cart window, you have multiple actions.
- Changing Order Types - Dine-In / Take out etc.
- Printing Receipts
- Print Labels
- Send order to kitchen (print or customer display)
- Void
- Assigning Customers
- PreAuth
Selling Items
Items are sold from buttons, or from the barcode scanner. Prompts may occur after them.
General Retail
Grocery
Grocery Sales can involve a variety of types. From labels printed by the store itself to barcodes provided on the items. We support the packaging of items internally at the store, like a butcher. It supports the labeling of items before providing them to inventory.
Liquor
Liquor sales are very similar to regular retail sales. You can manage cases of products using inventory. You can prompt employees to verify the customer's age prior to the sale.
Re-Sale Clothing - Re-Sale Products
Re-Sale Clothing and Re-Sale Products allow you to purchase and sell products with your customers. We allow for a buyback percentage, the percentage is the price you will sell the item for. The item label is printed at the buy-back point allowing you to easily label the item and put it on the floor for sale.
General Sales Information.
This is a simple set of notes for you to consider.
For the most part, we look at what we have covered in this section here as Sales, but some orders can be transfers of one product to another, or they can be inventory reductions. So not all transactions are sales.
Conversion Type Transactions
Depletion Type Transactions
Finding Items
Once you select an order or start one, you can add items to the order by using the categories, and departments on the left (using the search Icon in the upper left corner), or from the home page you can search for items.
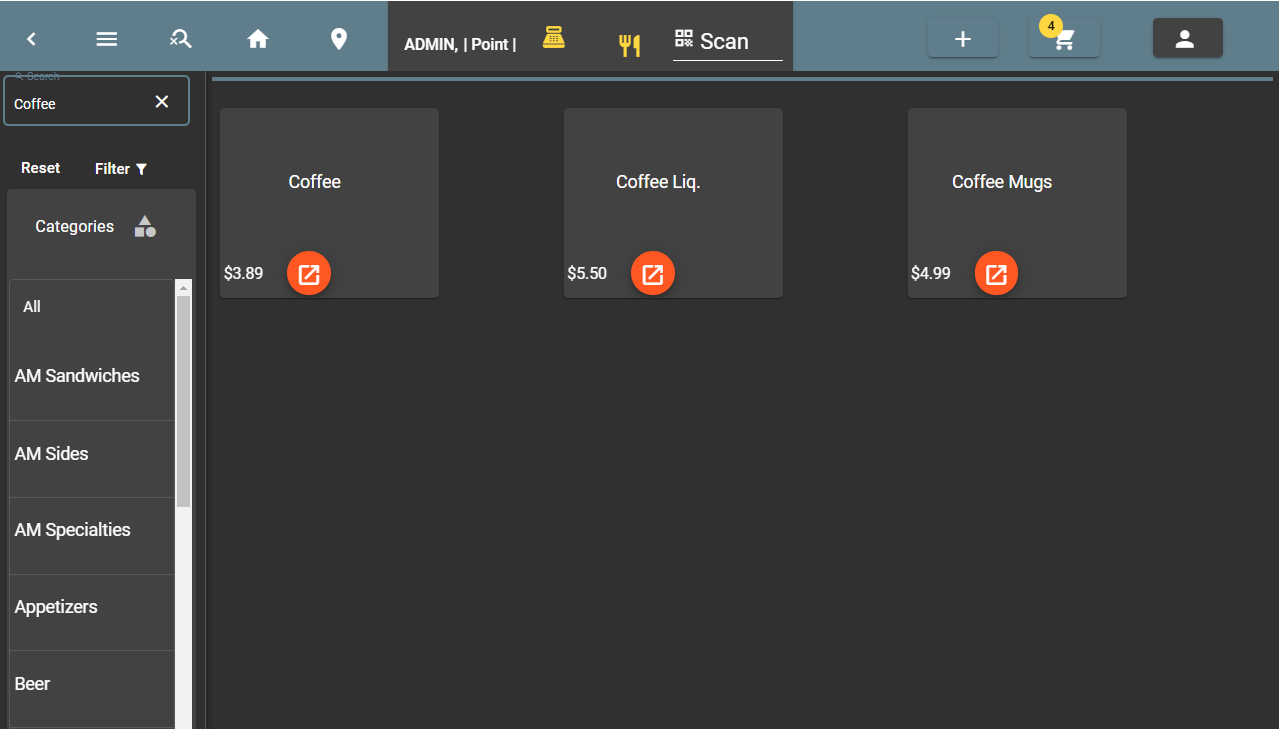
Search Items
Scanning Items
The scanner is enabled to scan whenever a new order is started, or a new order is selected.
If you use one of the fields, like looking someone up, and are using a USB Keyboard scanner, you will want to click on the scan icon at the top toolbar to begin scanning again.
Scanned Items
Item Size Prompts
Item sizes are prompted when they are applicable.
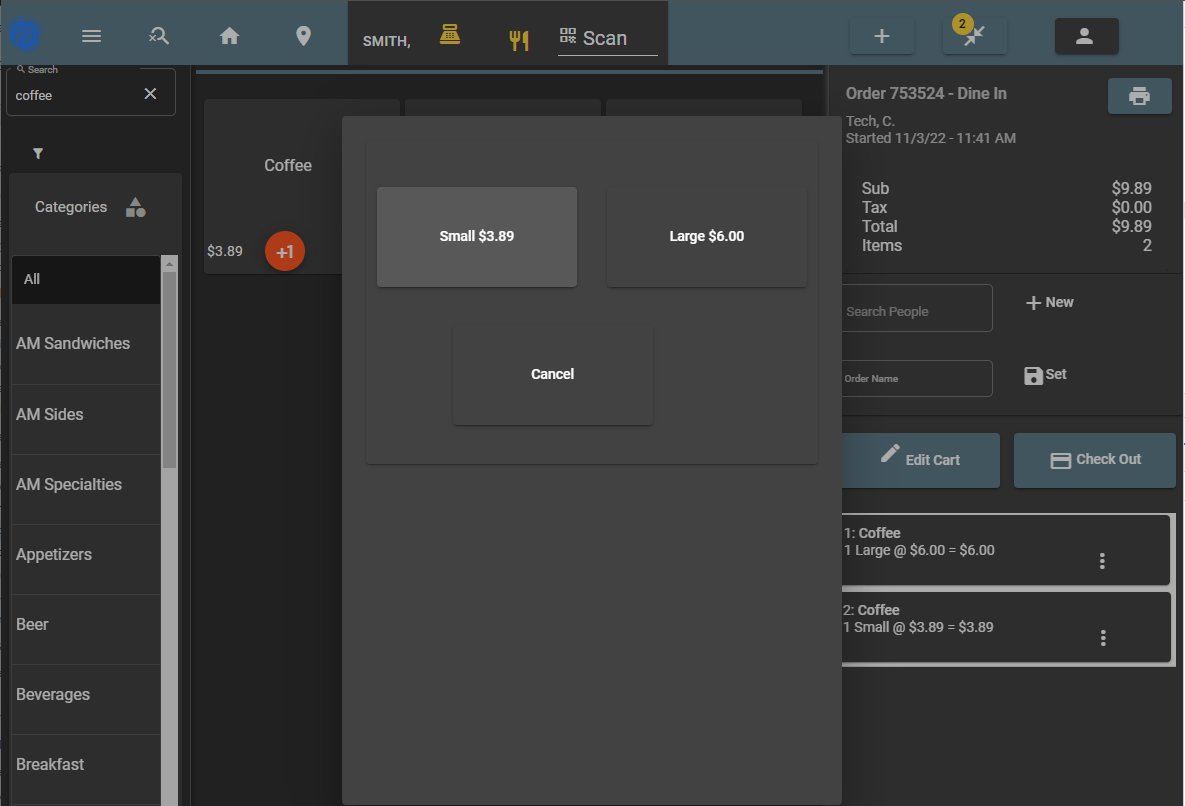
Choosing a Size
Walk Through Prompts
Prompts are walk-throughs of how to properly prepare the item.
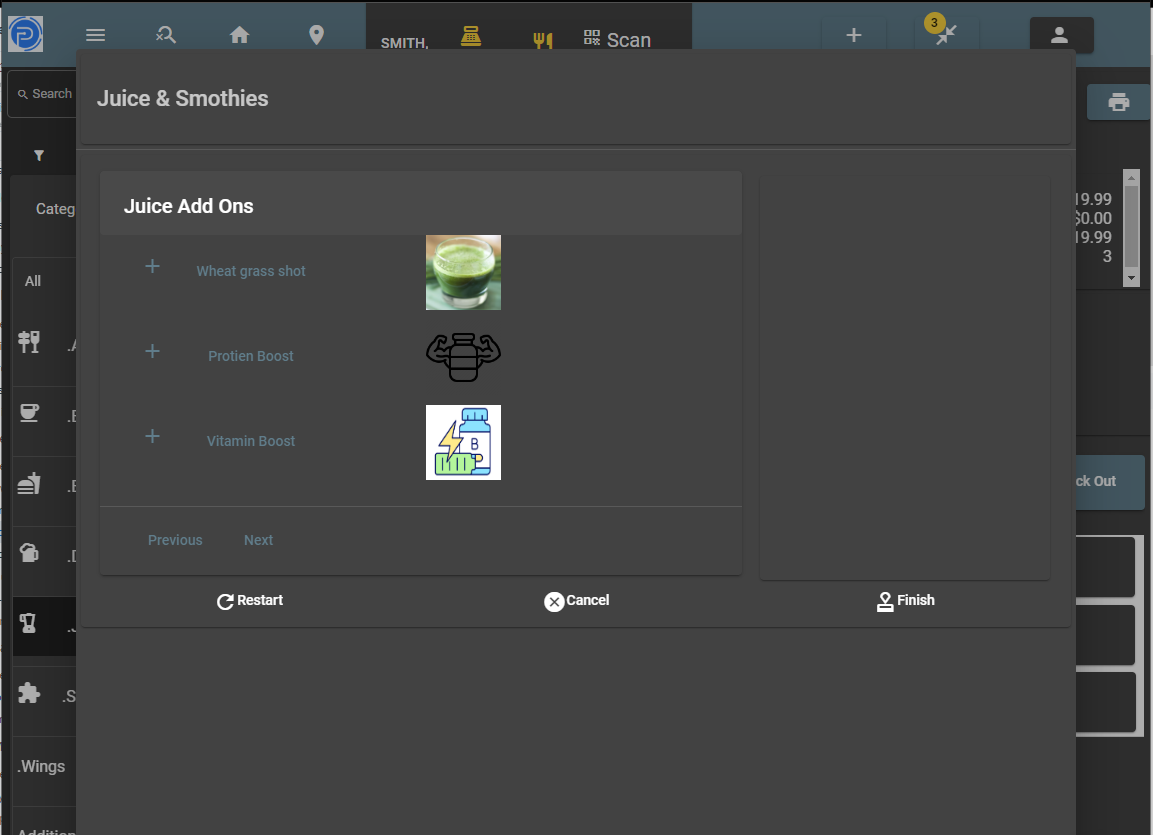
Prompt Walk Through
Prompts Video
Item Adjustments
Options to adjust items are dependent on the item type, as well as the status of the item. For example, you can not delete an item that has been sent to the kitchen; if that is the case, you can only void that item.
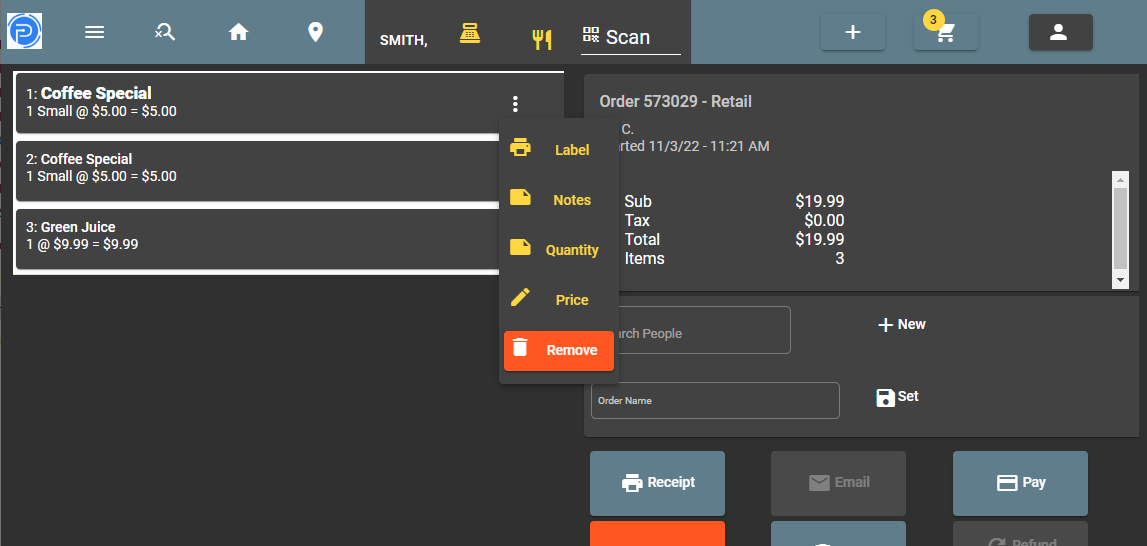
Item Option
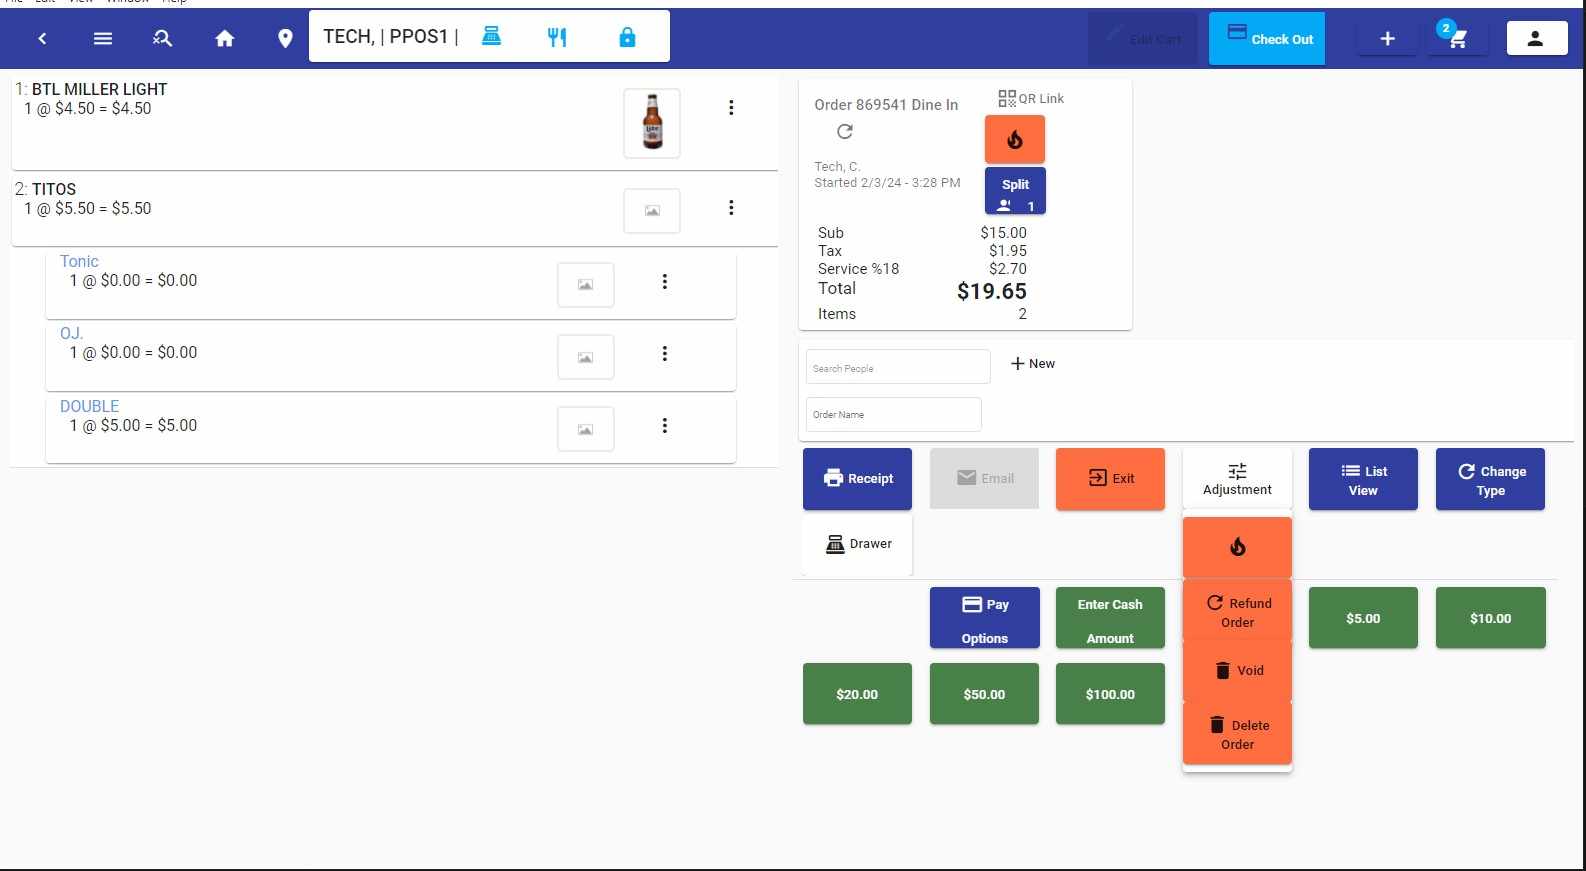
Voids/Refunds
Pre-Requisite. These features require the user type have the options enabled. Review User Authorizations You may edit Void and Refund reasons for voids under Settings - Software & Hardware Settings - Adjustment Reasons
Voids and Refunds can apply as an item, payment, or the entire order.
Void Refund
Refunds:
Refunds are essentially negative sales, and they can reduce the inventory by the quantity of the specific item you are refunding. You would start a new transaction, and if you have the type of transaction 'refund', you would use that. But it can also be a sale transaction with a negative amount.
Then you would change the quantity of the item to a negative amount.
The sale total would be a negative price, and by closing the order with the payment type, you would indicate that the amount has been withdrawn.
Voids:
Voids are used to set the amount of the sale to zero. These can only be applied to the current day's transactions. So if you wanted to void a past transaction, you would need to perform a refund.
To void a transaction, find the order to void. Then press 'edit cart' from the edit cart window you would use the button Adjust' and then select the 'Void' option.
Pre-Auth & Auto Increment
Feature Requirements:
- DC Direct
- If you want Auto Auto Increment, all devices should be assigned a credit card device with DC Direct.
- All Credit Card Devices should be Set as Credit Only.
** In Settings - Terminals
Enable Pre Auth For each Device in Terminal Settings.
** In Settings - Transaction Settings - Credit Card Settings
Enable Pre Auth in DC Direct, and assign a Value, i.e. 75.00
Optional - Enable Auto Increment
How To
- Apply Pre Auth
- Add items to the order.
- Go to Payment Methods - Select ‘Pre Auth’
- Use a card, or phone to apply the Authorization.
- The Pre Auth Value will be for the current items + the preAuth Value.
Increment Value
If you have Auto Increment with Pre Auth enabled, as soon as Items are added to the transaction that exceed the current Authed amount, then the incremental value will occur.
If you do not have Increment enabled, then you will need to go to the payments screen when you see the “Pre Auth’ button enabled in the upper right while in the order.
Special notes.
Only one PreAuth is allowed per transaction. If you void the pre-auth you will most likely need to do a regular sale after that, and not add another pre-auth to the transaction.