Product & Item Catalog & Menus
Products - Prices - Item Types - Taxes
Overview
The product catalog can range from just a few items for some businesses to thousands of items for others. Here are a few examples so we can center ourselves around thinking about what a catalog means to you and how you can relate to the catalog you'll be setting up.
- Self-Frozen Yogurt usually has just a few products they sell, a variety of cups to tare, and some drinks.
- Liquor Stores - Usually we can take CSV file that has many of the items, This means a list of several thousand items can be imported and very little data entry has to occur.
- Cannabis may require you to import your products from an outside system like METRC, and then modify the description of the product, and the chemical values, pictures, meta tags, and more.
- Restaurants - A menu might include happy hours and prompts and sizes. Manual entry is usually required.
- Clothing and Resale - Items might be entered only as customers bring in products. Or in batches when buying at an auction or elsewhere.
Product Catalog
Getting started with the catalog is simply opening it up, and reviewing some of the items. You can see the search options on the top, you can see what happens when you select items. You can perform a sale, and then use another tab in your browser to review the item and its details of it after the sale. Using the sale to see what occurs, and how an item behaves, is a great way to experience the settings of items and what features you might want to copy.
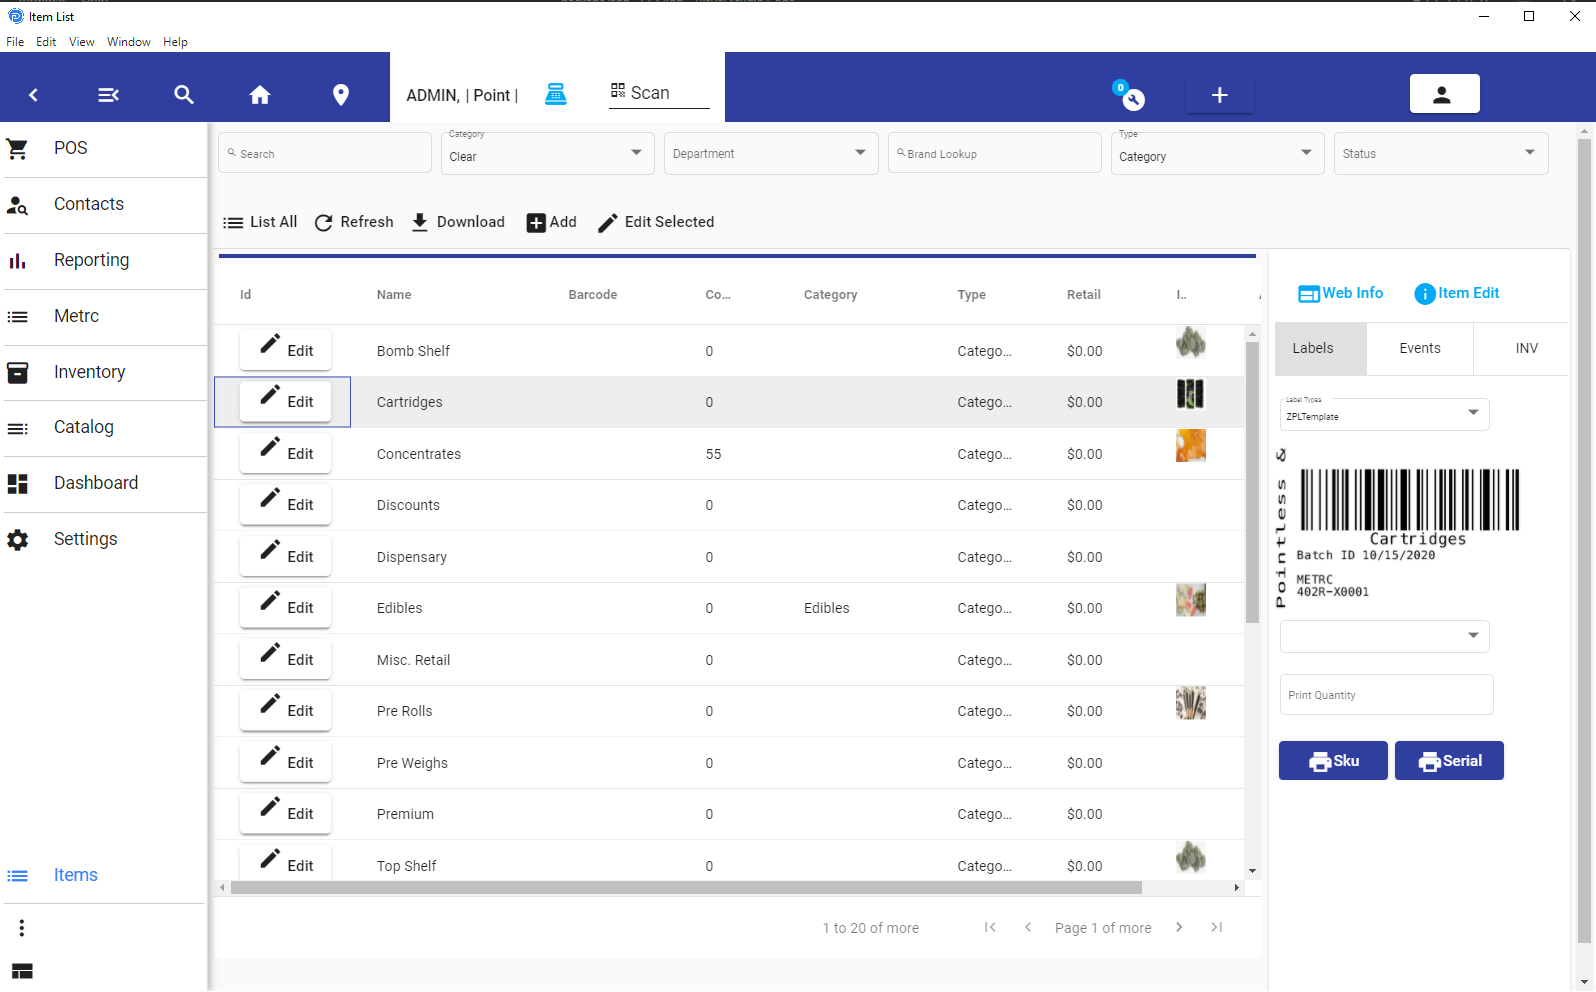
Catalog
Add Edit & Copy
Items are defined by their type. This controls the behavior of the options.
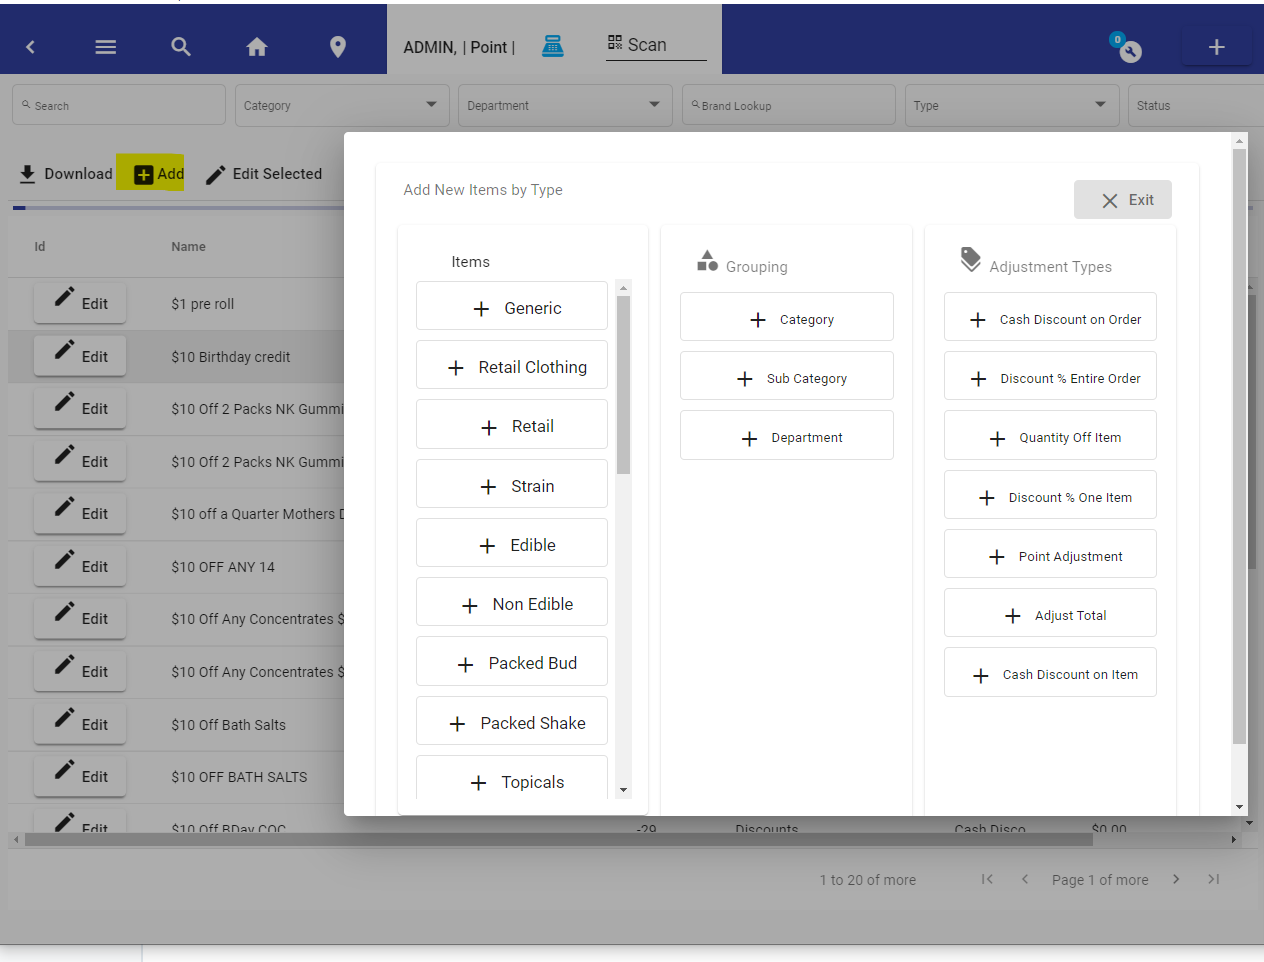
Add Items
Editing & Copying Items
Because there are numerous features about items, the window shows what's pertinent to each type. So if you were expecting certain features on an item you are working on, make sure the item type is set up according to what features you need.
Item types
Item types are defined when you initially set up the system, and you of course can go back and change them as you build your system. In fact, they are designed to be added to and changed, and updated.
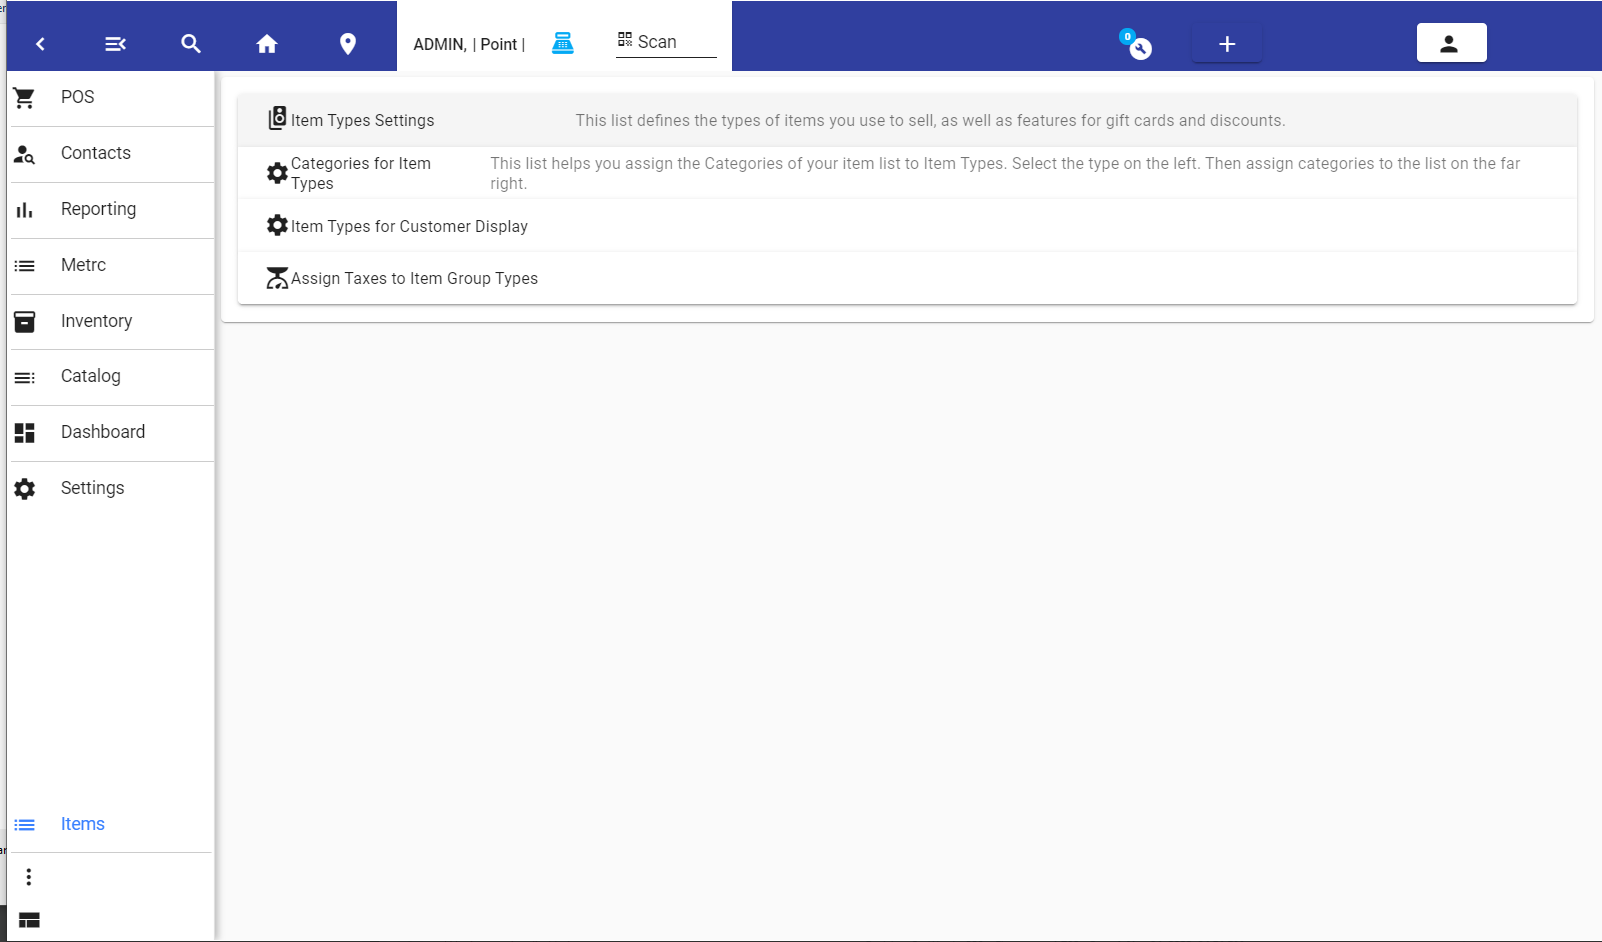
From the three dots on the lower menu, you choose the Item Types Section. And then expand the Item Type Settings.
From the Item Type Settings, you can edit, add and delete Item Types.
Item Types
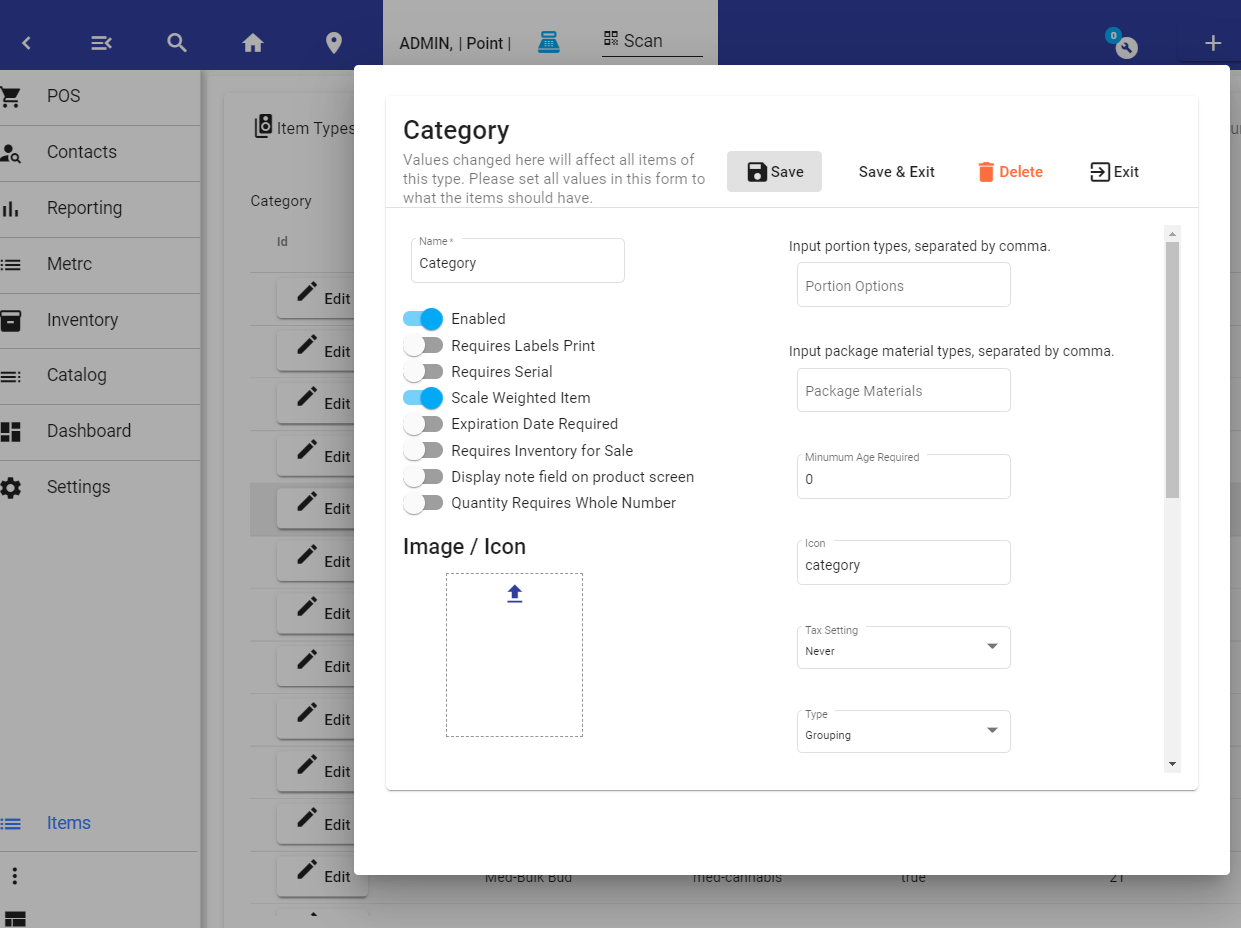
Editing Item Types
For the editing of items, you may compare types in the playground to your goals. Most of the features are self-explanatory. Over 50 item types are generated from the system initialization, so we have made many that will fit your requirements. There are so many, that you may wish to delete ones you won't use.
Item Type Edit
Item Types
Special Item Types:
There are several special Item Types that are defined by name.
Order Name: If you name the item type, order name, the name of the Menu Item chosen will become the name of the order.
Table Name: If you name the item type 'Table Name' the name of the Menu Item chosen will be assigned as the order's Table Name.'
Remove Service Fee. Remove Gratuity. If you name the Item type one of these two options, and assign it to a menu item. That menu item will remove the auto service or auto grat value assigned to the order.
Pricing
There are many ways items can be priced in Pointless.
- Single Pricing
- Price Categories - Multiple selections of prices
- Automatically adjusted prices, by time, date, or day of the week (happy hour)
- Pricing Based on clients or client type
- Price Tiers - Grouping of Prices based on Weight / Quantity
Single Pricing
When you open the Product Editor, the single price is shown, and you can edit it. You can then test the item in a sale.
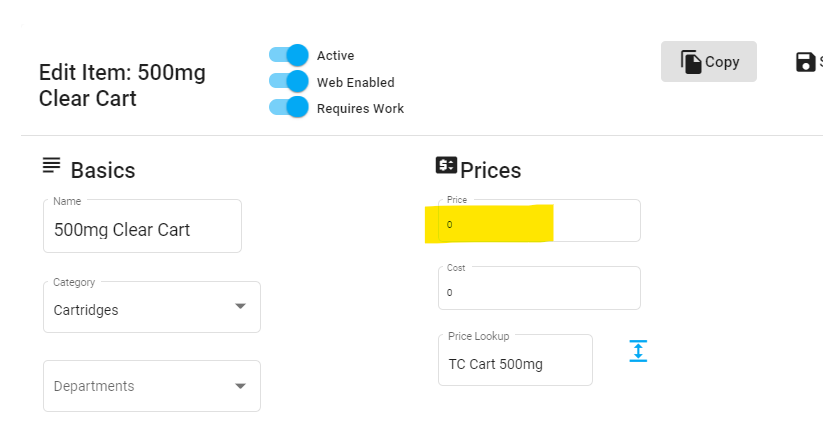
Single Pricing
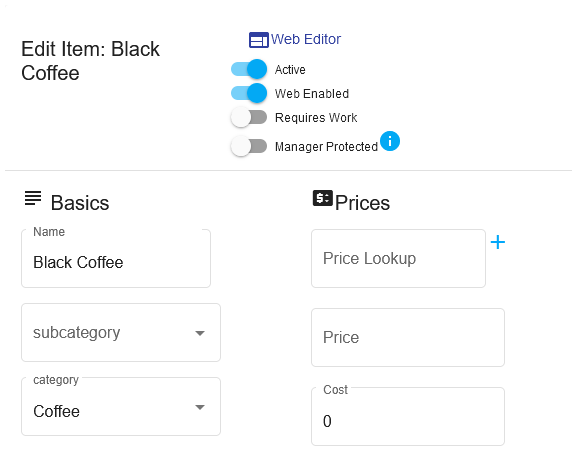
Price Categories
Price categories are price groups associated with an item. They are not specific to any particular item but can be associated with many items.
Also, they are used when you want to have one item, with multiple sizes. Like 12oz, 16oz etc.
You will see a + symbol next to the price lookup if no category is selected. Or you will see an 'Open/Expand' icon if there is a category selected.
You would then press the + button and add in each zie you want to use with this. We'll enter three sizes for the coffee in this example.
*Make sure you enter the name of the price category, and then press save before entering sizes / prices for the category.
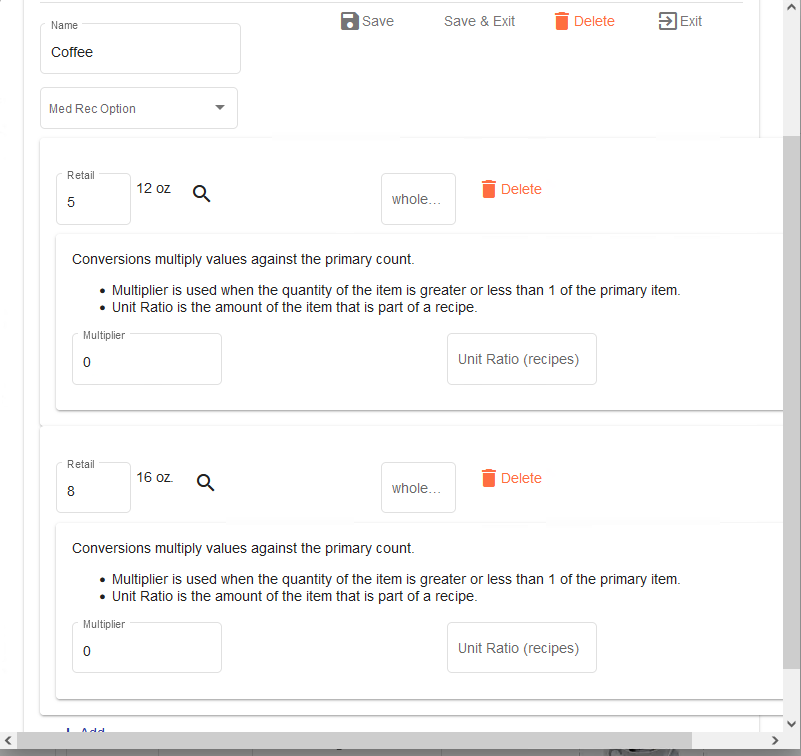
When you have entered the sizes and prices, you can verify the results by adding the item on the order.
Price Categories Edit
You can edit and add price categories. This submenu gives you access to the full-price category list.
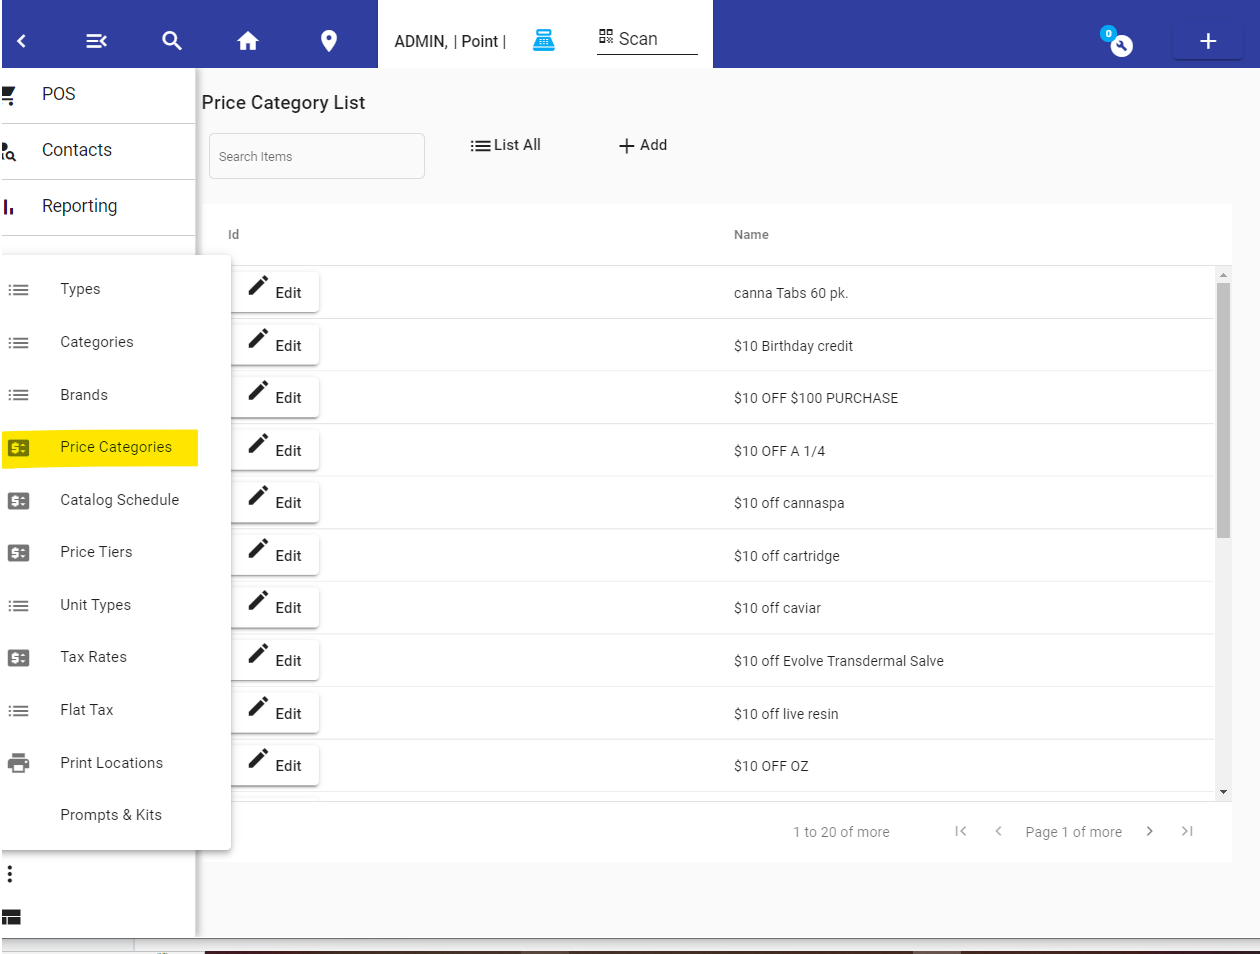
Price Category List
Price Categories Used to Change Inventory Sales Multiplication
Price categories have the added benefit of being able to affect the multiplier of inventory.
In some instances you can use the multiple selections of an item, to also indicate a different quantity being sold. For example, you can have a discount when buying 5 items, and use the price category to prompt the user to select 1 or 5, the inventory reduction will be five, but the sale quantity will show one.
Price Tiers
Price Tiers allow the user to sell an item without considering the price, yet having prices automatically adjusted for the quantity sold. They provide the additional benefit of providing a price when between a range of quantities.
When used with a scale, they can provide auto pricing very quickly for the cashier.
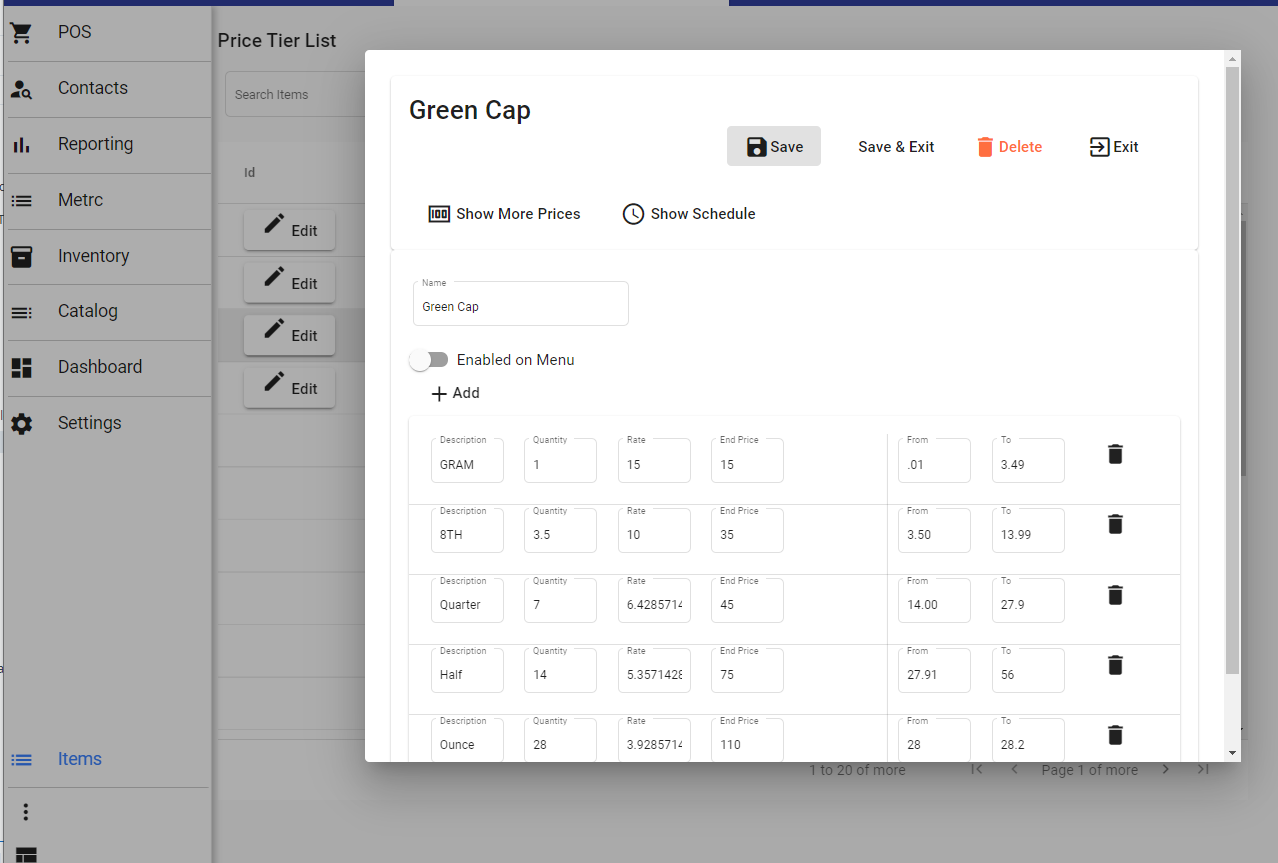
Price Tier List
Price Tier menu on Main Home Page
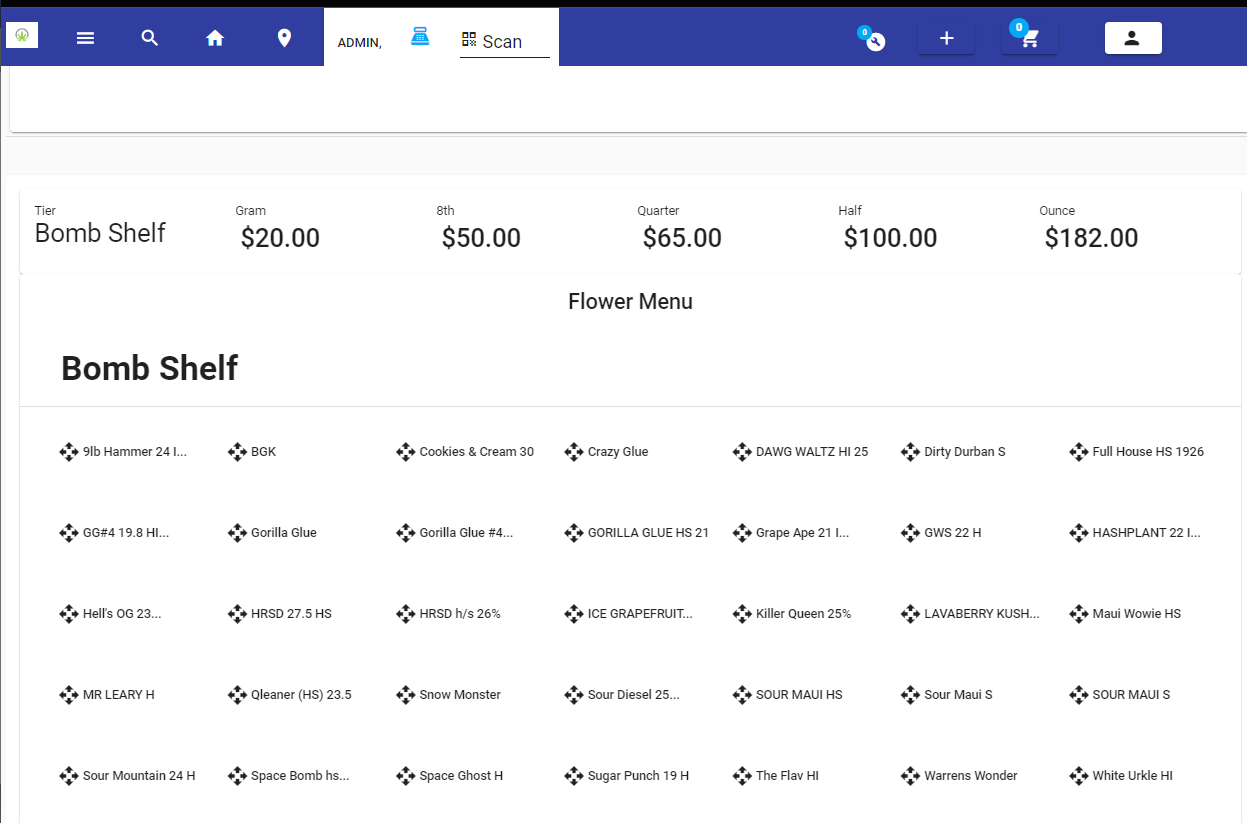
Price Menu Price Tier
Inventory Reconciliation
What it's for:
This kind of transaction updates the product count field in the Catalog of items. If you do not use the inventory module this is how you would reconcile your product count/inventory.
To do a Reconciliation:
From Item Catalog. You can use the filters to create a smaller list of items to reconcile. You may use the Department, Category, or Item Type to filter.
Then use the 'more' menu button. You'll find the reconciliation button in the 'more' menu. When you press it it will open a new transaction with the items that are > 0. So all of your 0 items or negative items will not be included in the reconciliation.
Once in the Reconciliation transaction (pictured below), input the quantity of product you have. There are features to search for the items in the list and update them. It can be done from any browser/tablet.
Once you are done, press 'Apply Counts & Close'
The transaction sits in the suspended orders. You may go to the Orders, then Search. And Select 'Suspended Orders'.
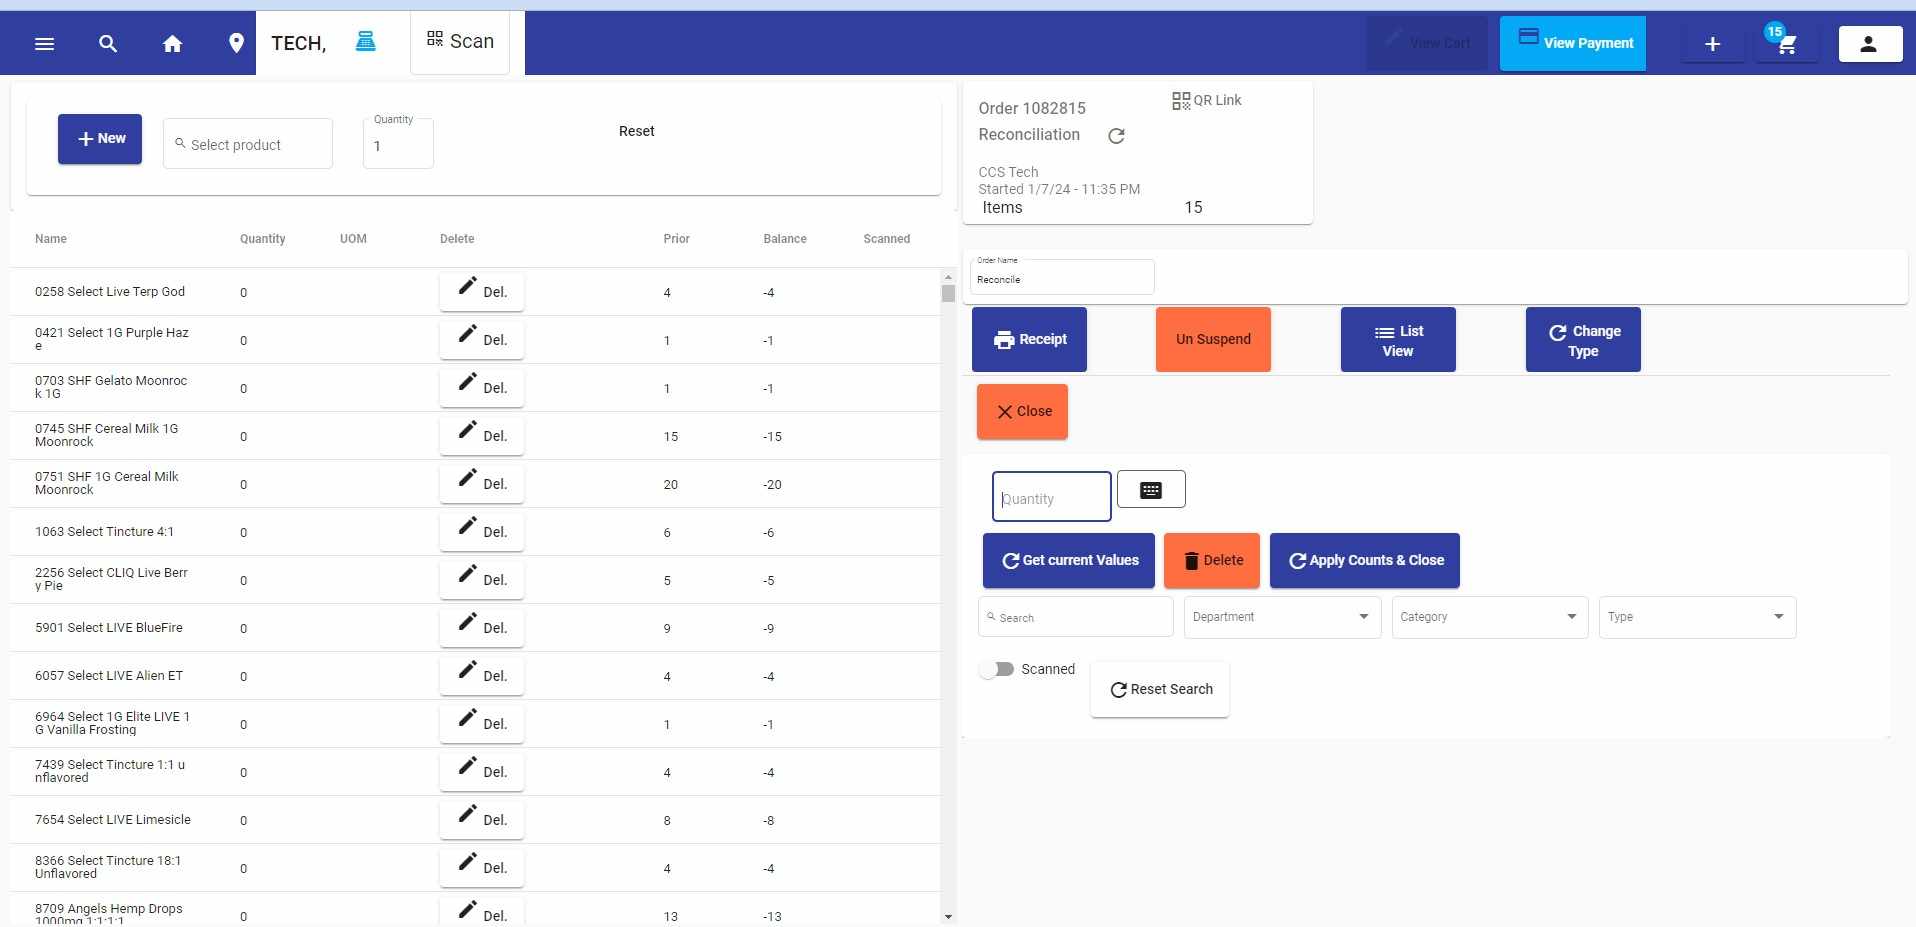
Reconciliation Transaction
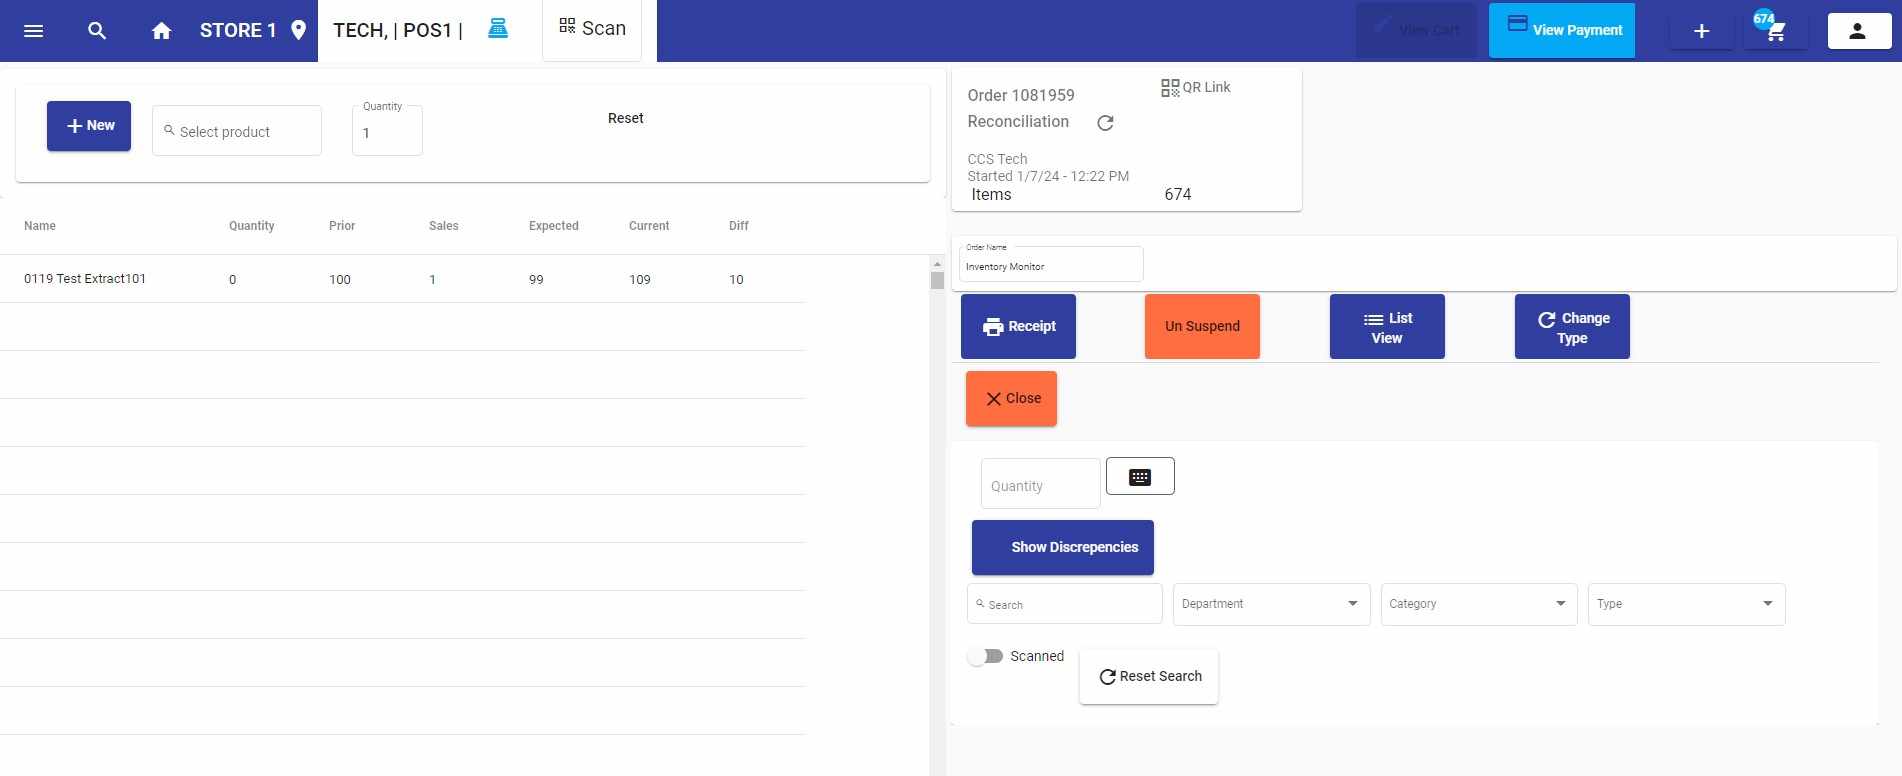
Inventory Monitoring
You would make this Transaction under - Catalog - 'More' - 'Inventory Monitor'
It keeps an up-to-date calculation of your inventory between reconciliations.
What does that mean? You will always know if there are discrepancies in your inventory, in real-time.
How does it work? It's as simple as starting the transaction, and opening the transaction whenever you want to see what the status is to see if there are discrepancies.
The transaction sits in the suspended orders. You may go to the Orders, then Search. And Select 'Suspended Orders'.
discrepancy