Settings
Settings
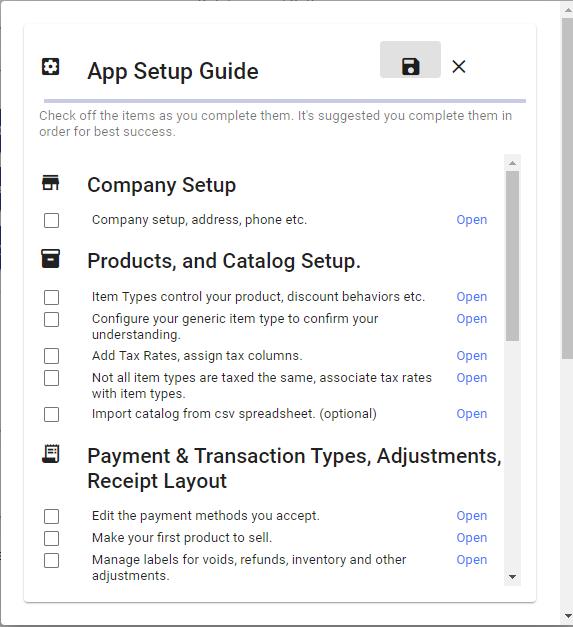
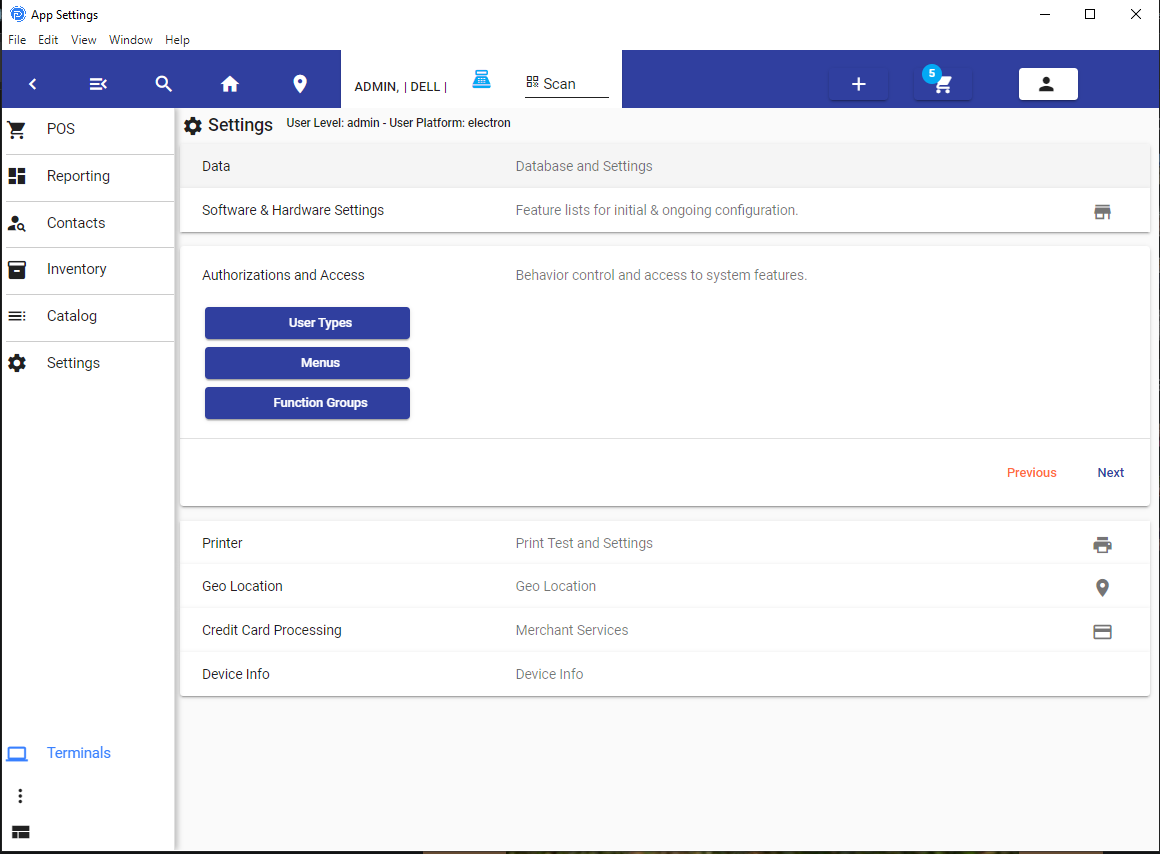
Settings may be an obvious start to the application. We have an App Setup Guide that will walk you through each section of the software in order to help you set up each feature in the proper order. This can be accessed from ‘Software & Hardware Settings. This is strongly encouraged as the place you get your start.
Data
Things to note about this section are: Instructions are provided on the screen.
- Version Info of the app.
- Cache Settings
- Data API Address
Software & Hardware Settings
Each section here is usually covered in the initial setup. Each screen has simple instructions for what features are required.
You can always open this screen after you have performed the setup, and it can remind you of the sections you did in your initial setup.
It’s very convenient to walk you through all the necessary sections to run the system and apply the necessary settings.
Layout Settings for Users and Staff
The layout for staff and customers depend on these settings and is designed to provide the best user experience. Not all settings may apply to your type of business. So some settings may not make sense to enable.
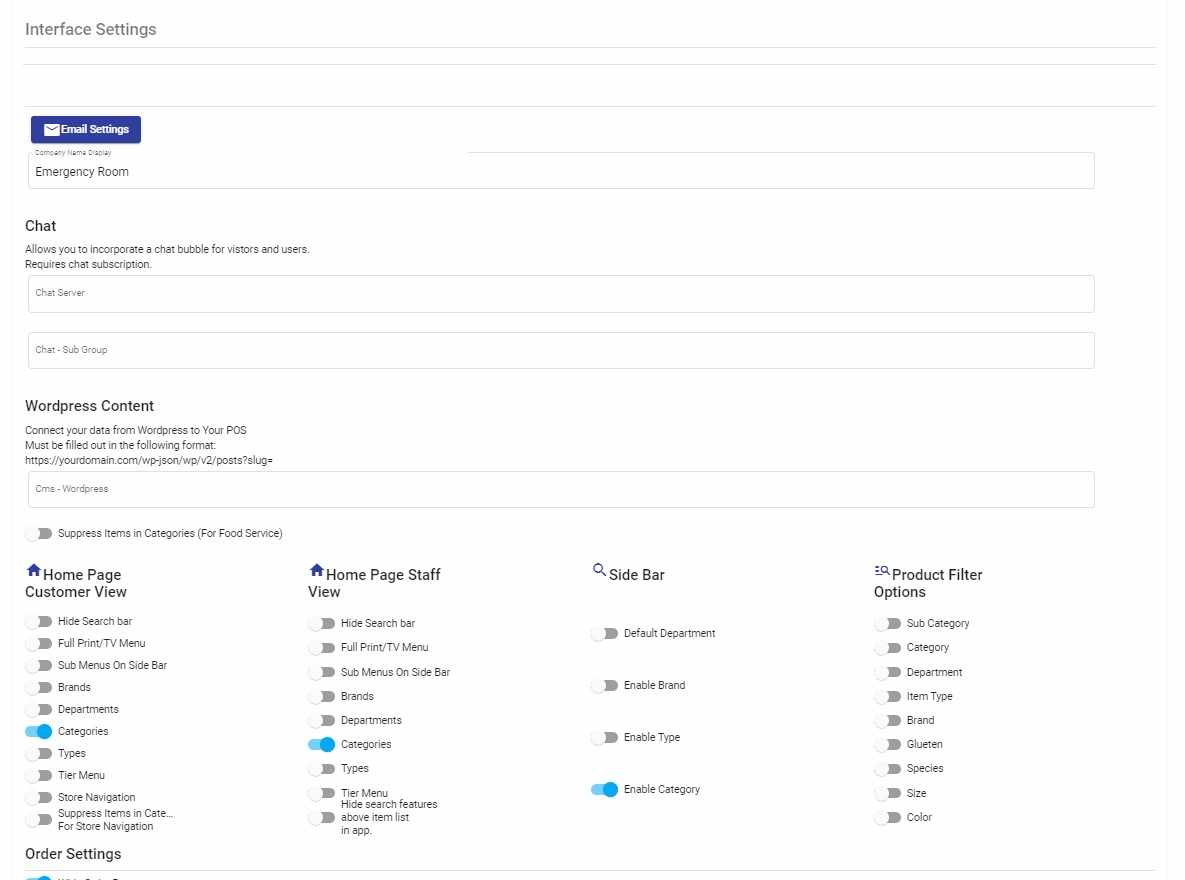
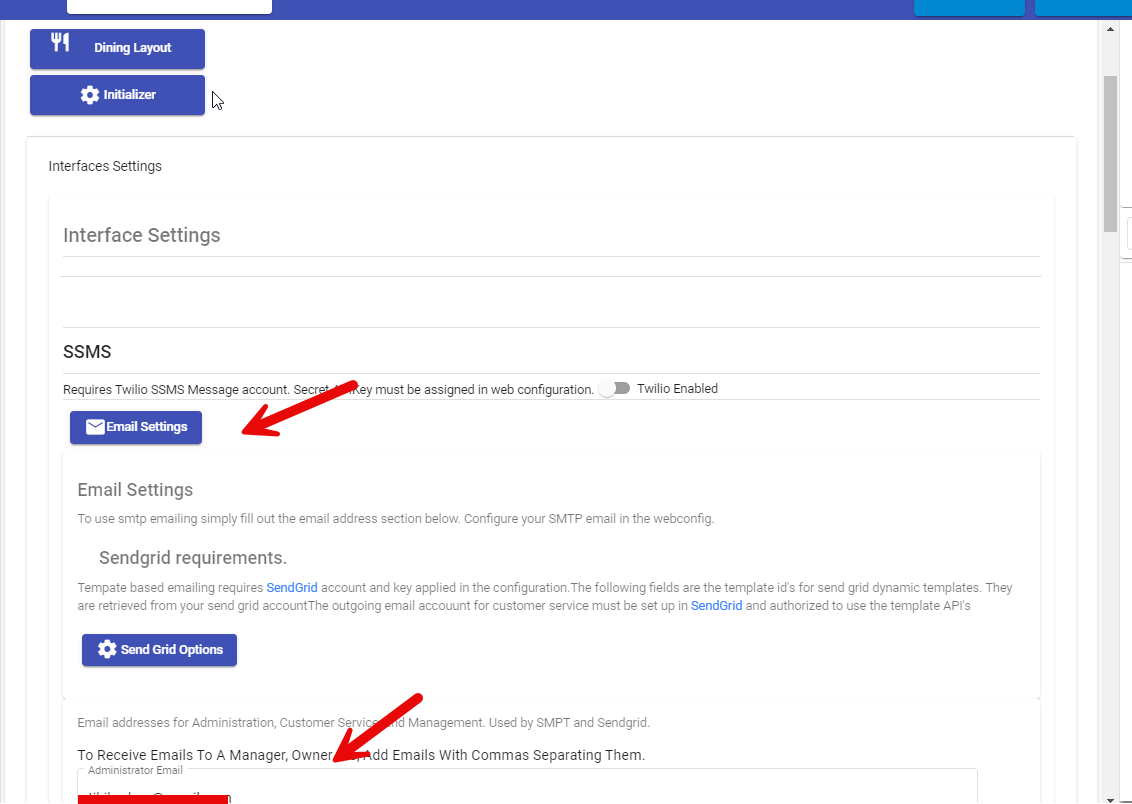
Interface Settings
Email
Email is used for:
- Notifications: voids, price changes, refunds
- Customer reciepts, and notifications of order readiness
- Reporting : End of Day, Balance Sheets
- Exception reporting -for errors.
You would setup email underneath these settings. This also requires you confirgure the smtp settings in your webconfig. We recomend Zoho. However any smtp service will work, provided you apply the settings.
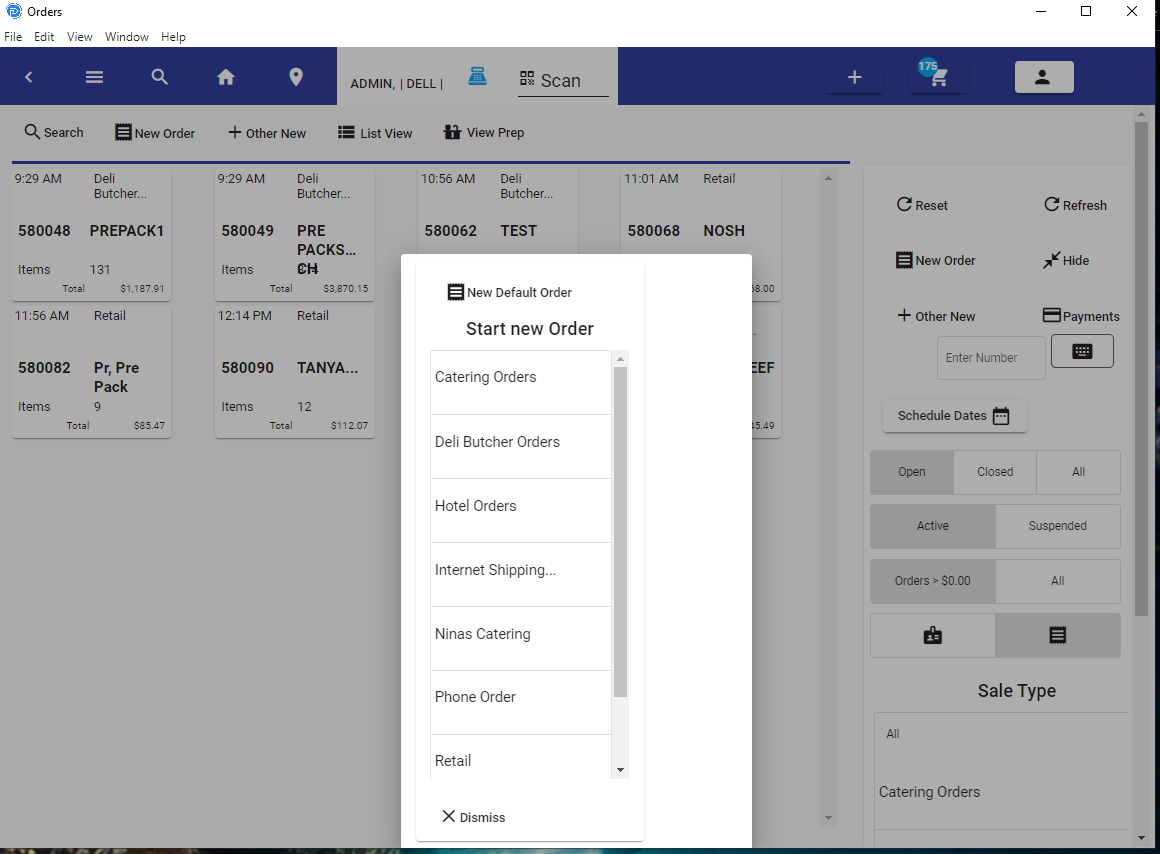
Transaction Settings
These features apply to the transaction. They can be updated at will and will apply to the terminal you are working on at the time you change. These settings may require the POS Software on other terminals to be restarted before the changes apply.
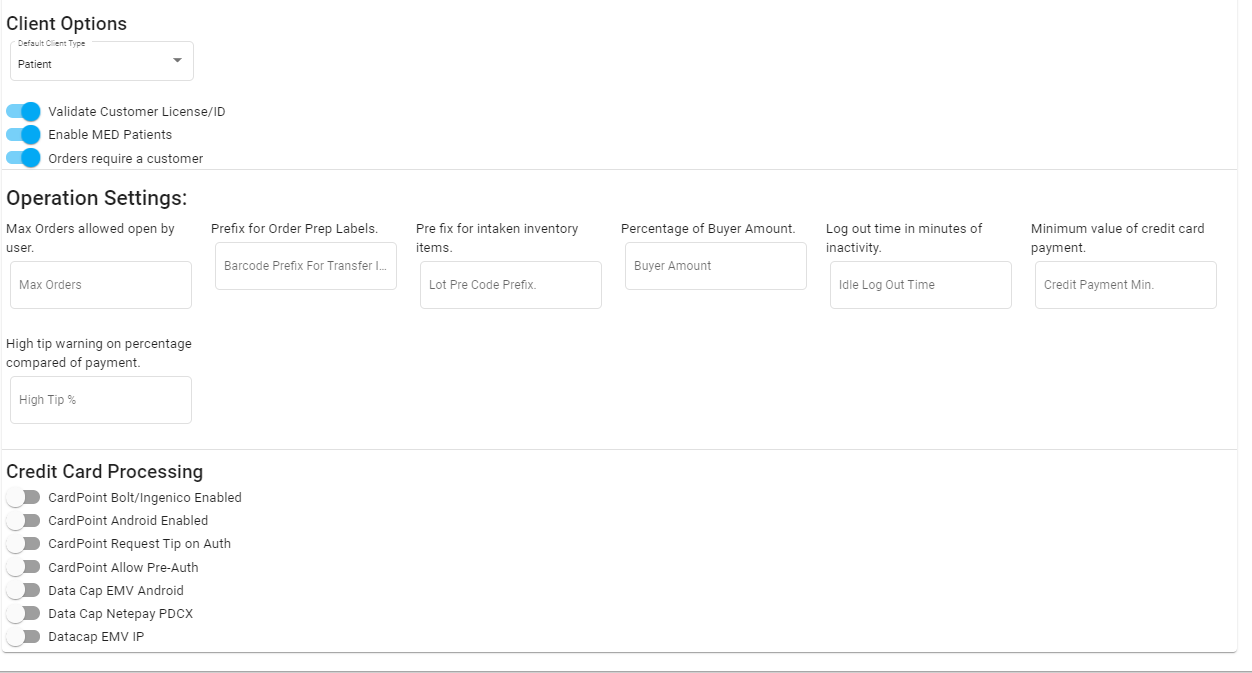
Authorizations and Access
This section is covered here: Auth & Access
Printing - Labels & Receipts
Printing is a dynamic subject. We recognize that each type of business has a number of features they need.. Plus you might just have some features you want that no one else does. With that in mind, we have a very flexible system that allows you to print receipts in many ways possible. And print labels with a variety of templates.
There are some limitations. Android devices require ESC POS formatting, which has some limitations when compared to formatting like Windows does or printing the same as HTML. So for receipts for Browser Print out or PDF, and printing from Windows in general, we have a flexible HTML option.
To allow you to make changes, without affecting your business printout, you may use the copy feature to copy your existing receipt template, modify the copy, and then once you are ready. Then you may apply the new template as the primary one. We also have the playgrounds you can copy the receipt settings, or refer to when designing your receipt.
Expo Settings
If you would like a print out that contains all the items that need to be prepared, regardless of the location, then assign the Expo Printer in Settings - Transaction Settings. You will need to assign a printer that has a common name accross all terminals, you will need to ensure you type the name properly. You will also want to set a template.
This setting may require the cache be refreshed on the terminals, or the the IIS may need to be restarted.
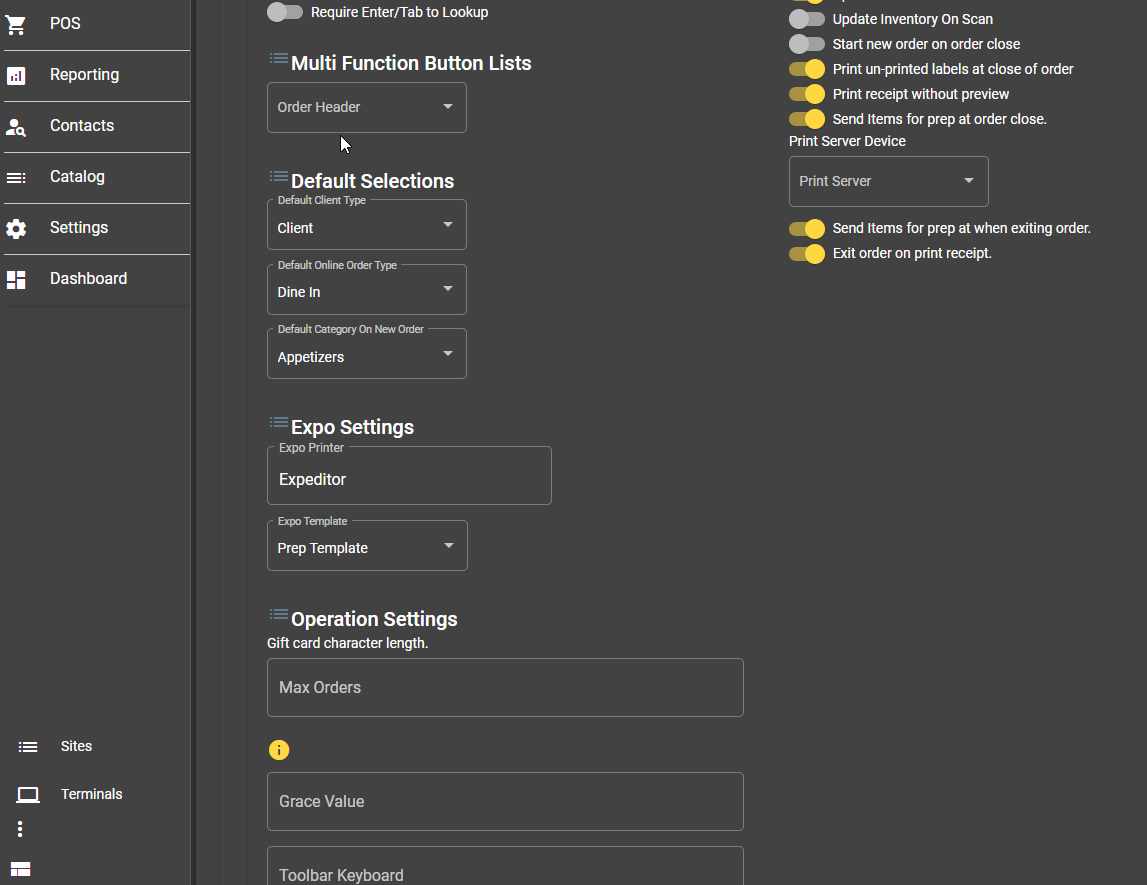
Expiditing
Terminals - POS Tablets and Computers
POS Devices are managed from the POS Device list. This is under settings under the sub-menu.

Settings for each device include peripherals, credit card devices, printers,etc.
You will need to name each device. From the physical terminal itself, press, the button ‘Assign Device’ from the device that relates to its name. This will ensure that the settings you made will apply to the appropriate device.
The most basic settings would be what you see highlighted below in the screenshot. For Android, make sure you log into the device, open the related device from the Terminal list, and then apply the Bluetooth printer. This is because the only way to identify a Bluetooth device is from the Tablet it has been paired with.
Device Info
POS Token
Adding a POS Token will provide your app with the option for Employees to use their PIN Code to login.
Under settings, you'll find the last section is "Device Info". The POS Token is a value from your WebAPI that you privately assign; it is not something you share or store elsewhere. In order to enable this feature, you need to make sure you have your POS Token assigned in the
Look for the key PINCodeToken. If you don't have it, you can copy this and paste the snippet below, it into the App Settings section. Be sure to replace the string that indicates change with your own unique code. You don't want to use the standard code, otherwise, you are subject to someone guessing it's being used.
<add key="PINCodeToken" value="PINToken\_EnterAVeryLongRandomStringOfCharactersandNumbers" />
Device Name.
You can assign your device the same name you assigned the terminal name. This is required for using a customer display in conjunction with the POS.